*NOW BOOKED FOR 2024* Transitmania 15 @ Santa Pod 19th to 21st July 2024 *ALL DETAILS HERE*
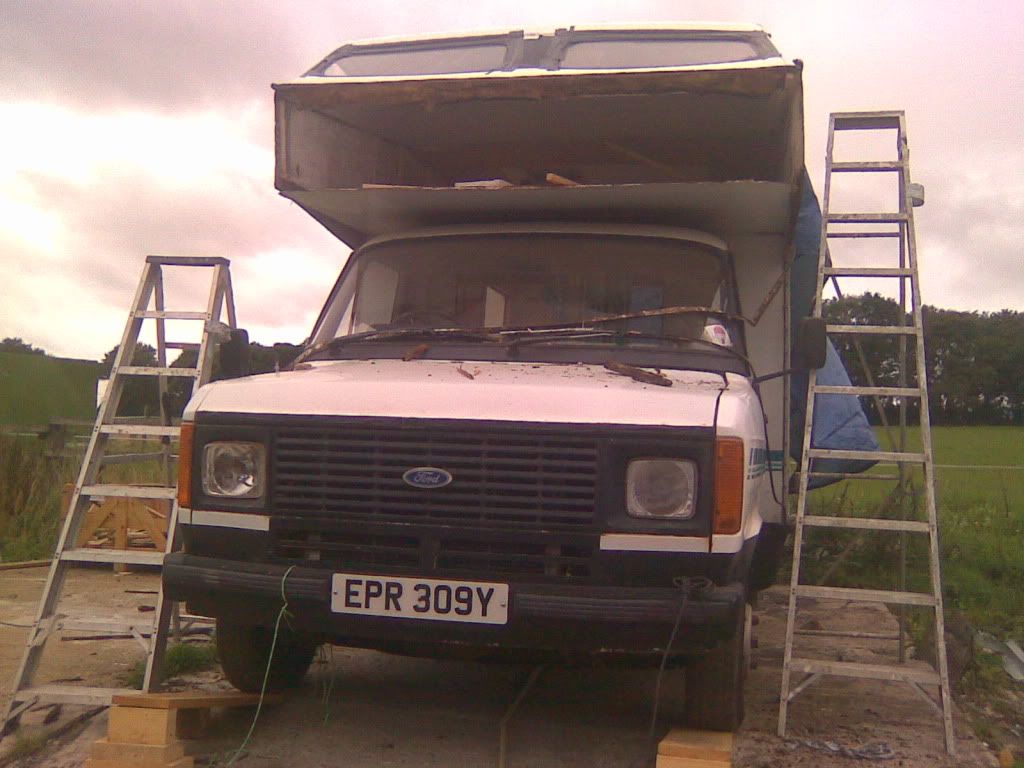
My latest project mk2 CI Travelhome LWB
Re: My latest project mk2 CI Travelhome LWB
![]() by Luke » Sun Aug 15, 2010 11:53 pm
by Luke » Sun Aug 15, 2010 11:53 pm
weld in a bulkhead and fit a pickup back 

-
Luke - Site Admin
- Posts: 44078
- Joined: Wed Mar 02, 2005 12:53 am
- Location: Rotherham, Yorkshire!!
Re: My latest project mk2 CI Travelhome LWB
![]() by madmark » Mon Aug 16, 2010 1:25 am
by madmark » Mon Aug 16, 2010 1:25 am
- madmark
- Transit Extremist

- Posts: 15467
- Joined: Thu Mar 03, 2005 4:29 am
Re: My latest project mk2 CI Travelhome LWB
![]() by Gunslinger » Mon Aug 16, 2010 7:55 pm
by Gunslinger » Mon Aug 16, 2010 7:55 pm
davev6newman wrote:O course you are right, and if i was going to keep the camper i would do that. But i bought this initially for the engine and i was going to put a pinto back in and sell it on. But looking at the condition and knowing there would be work for the mot which was due i had a feeling i was on to a loser.
So i wanted to revamp the interior and tidy up the exterior and recoup my money and get the engine for free. This was the plan before i started to rip it out and find the rot, but im not going to give up, but im only doing the bits i need too and on a budget. I will of course cure the leaks and replace the rotten bits so the next owner wont have any damp issues.
If your going to pass it on, knowing there is that much work, and the new owner may well find it right away, it might, and this is only speculation, be better to strip it back, and sell it on as an unfinished project
Luke wrote:weld in a bulkhead and fit a pickup back
I was so expecting to read "weld a caravan shell on it" there for a minute
-

Gunslinger - Transit Devotee

- Posts: 1720
- Joined: Sun Apr 03, 2005 12:24 pm
- Location: west oxfordshire
Re: My latest project mk2 CI Travelhome LWB
![]() by davev6newman » Tue Aug 31, 2010 9:24 pm
by davev6newman » Tue Aug 31, 2010 9:24 pm
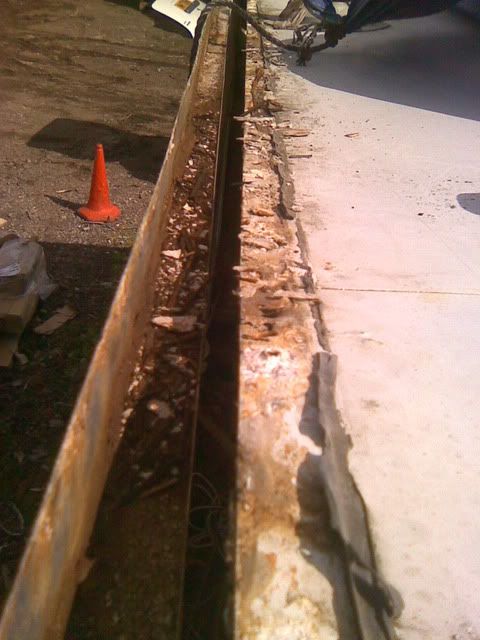
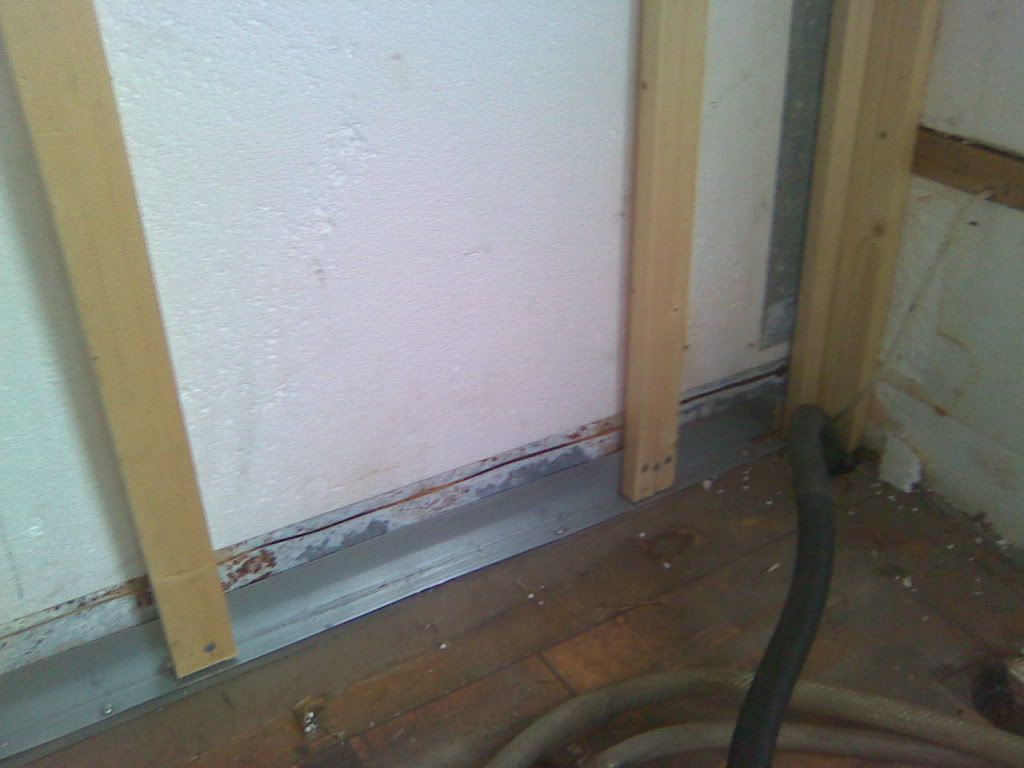
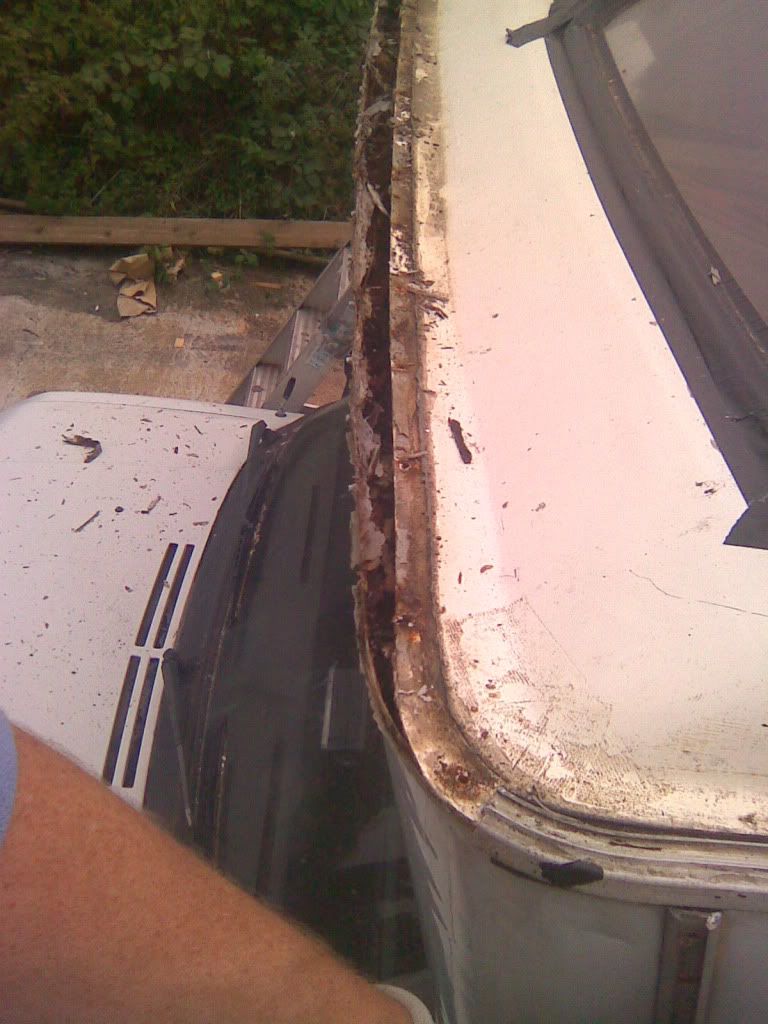
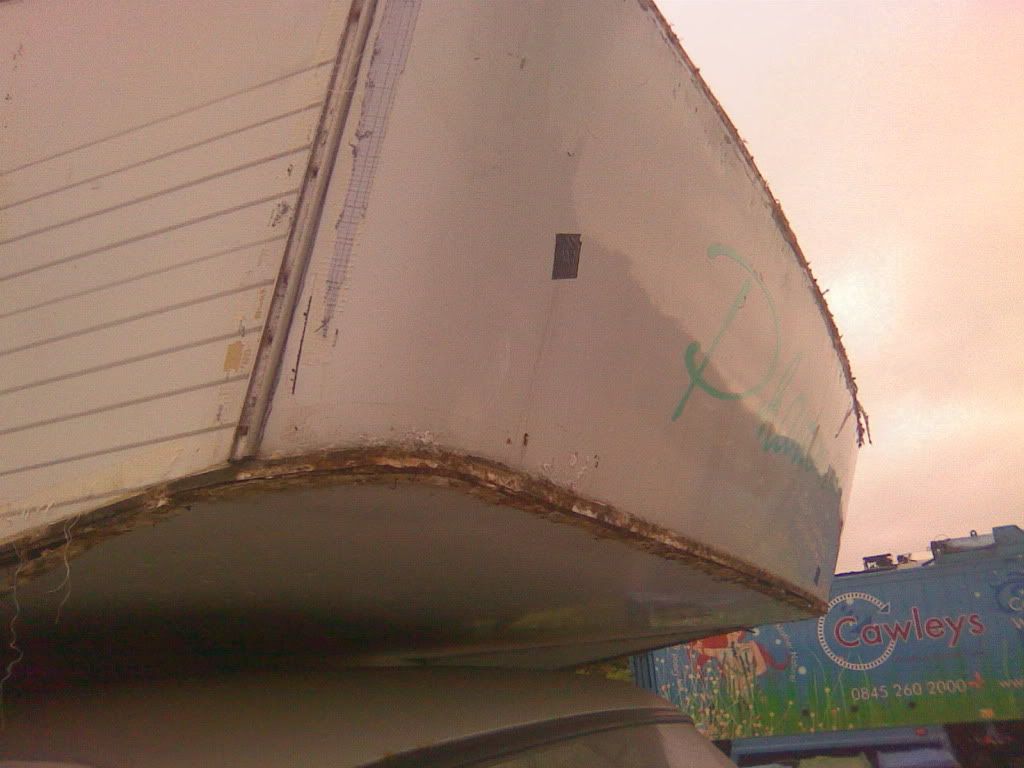
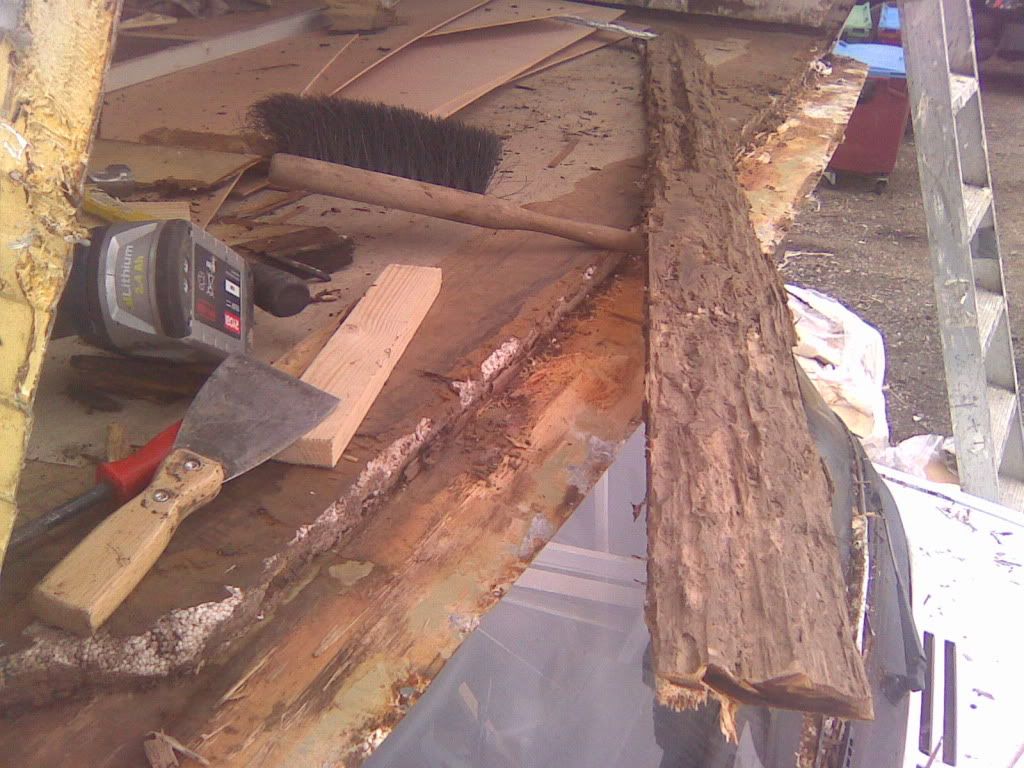
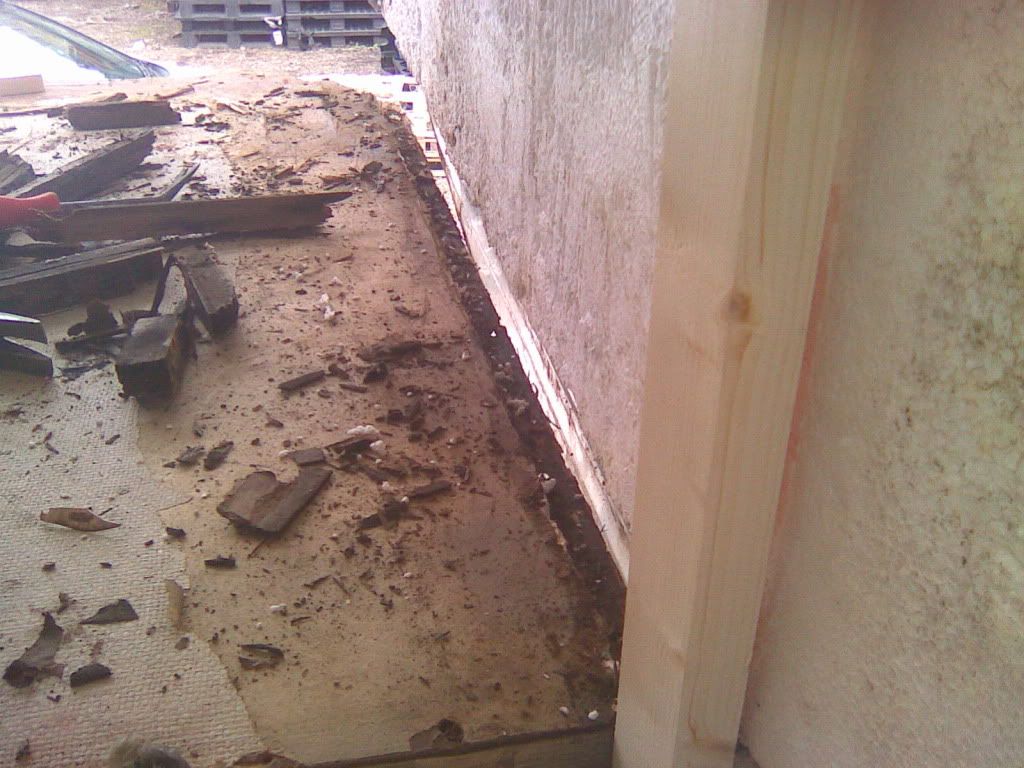
Well........there are no good bits to keep in this van, every single piece of timber is rotten. So i have decided to strip it right back and start again.
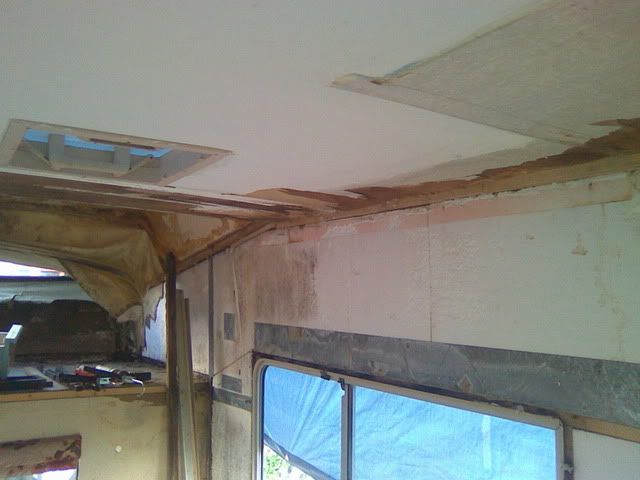
Where i thought it was leaking from the roof was just the start, there was no good timber running along the length of both sides that hold the wall onto to the roof. So water was just pissing in and every noggin was rotten.
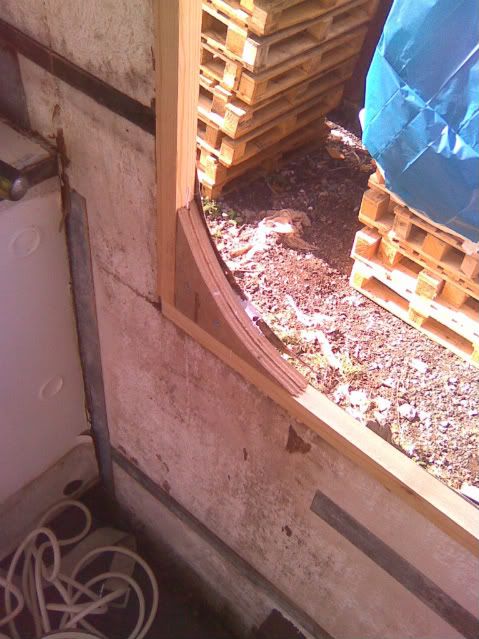
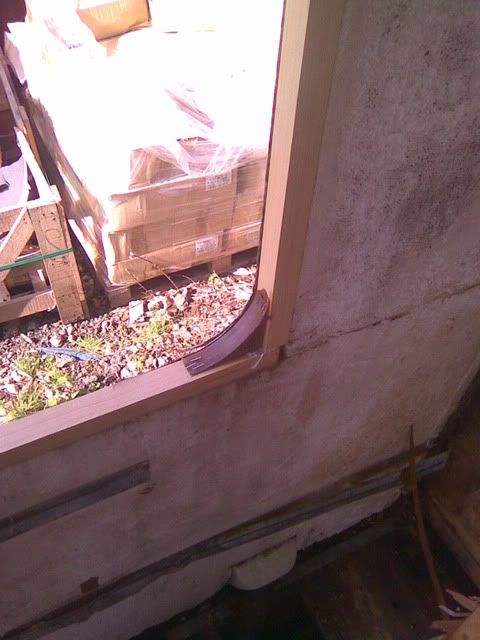
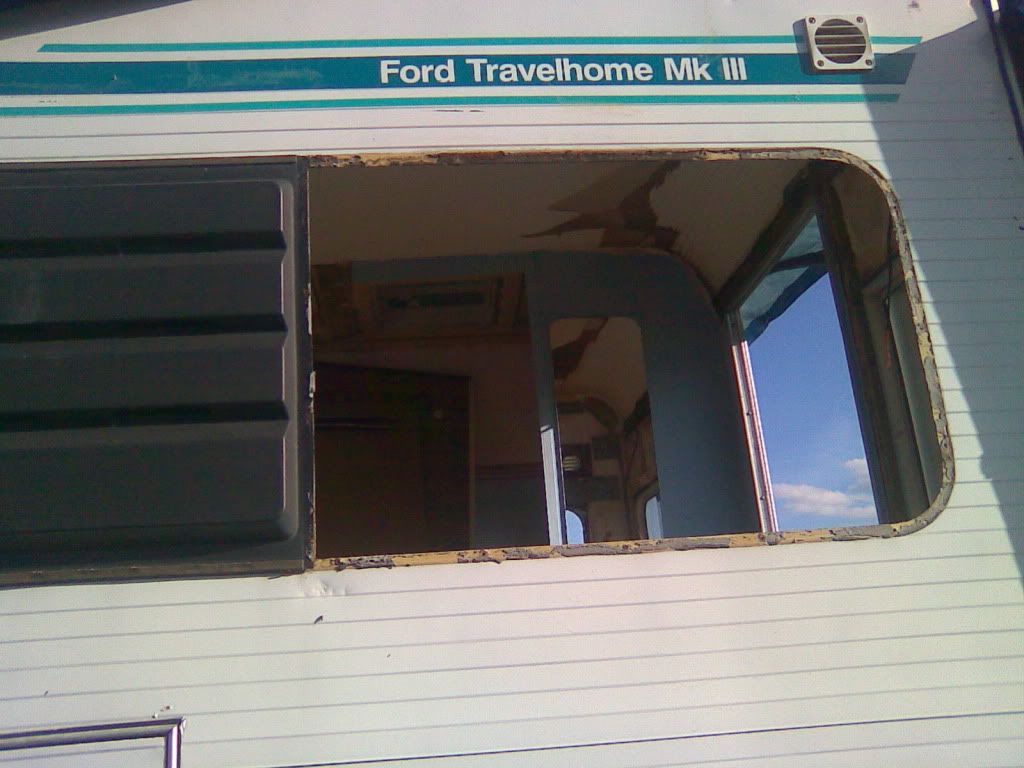
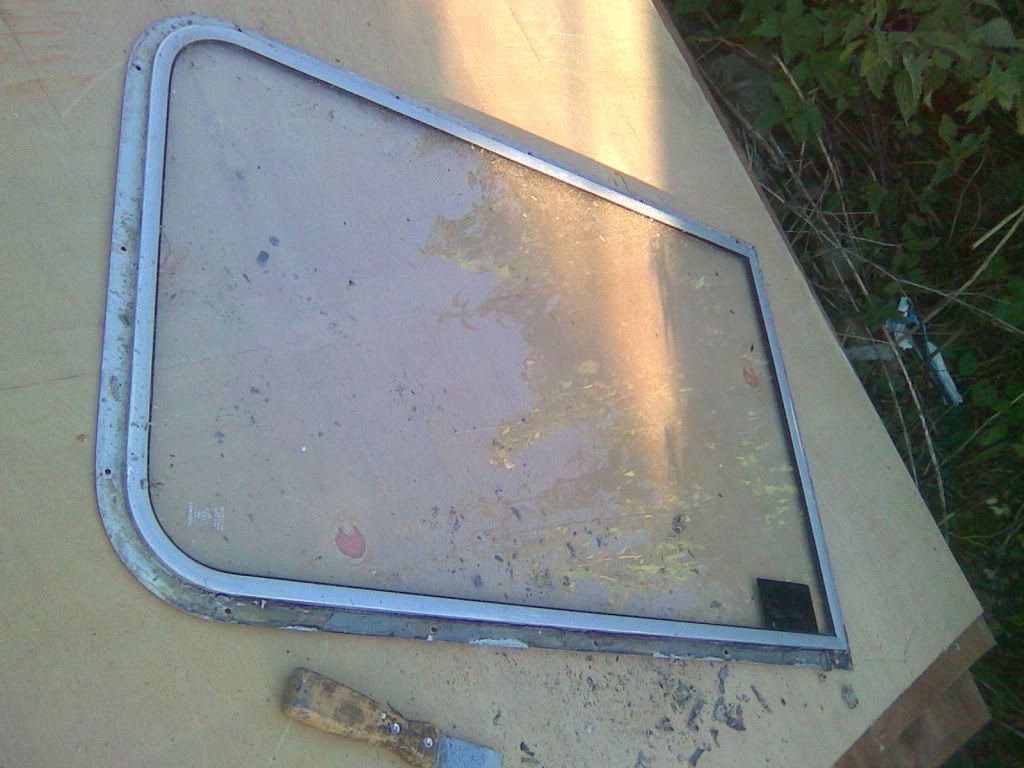
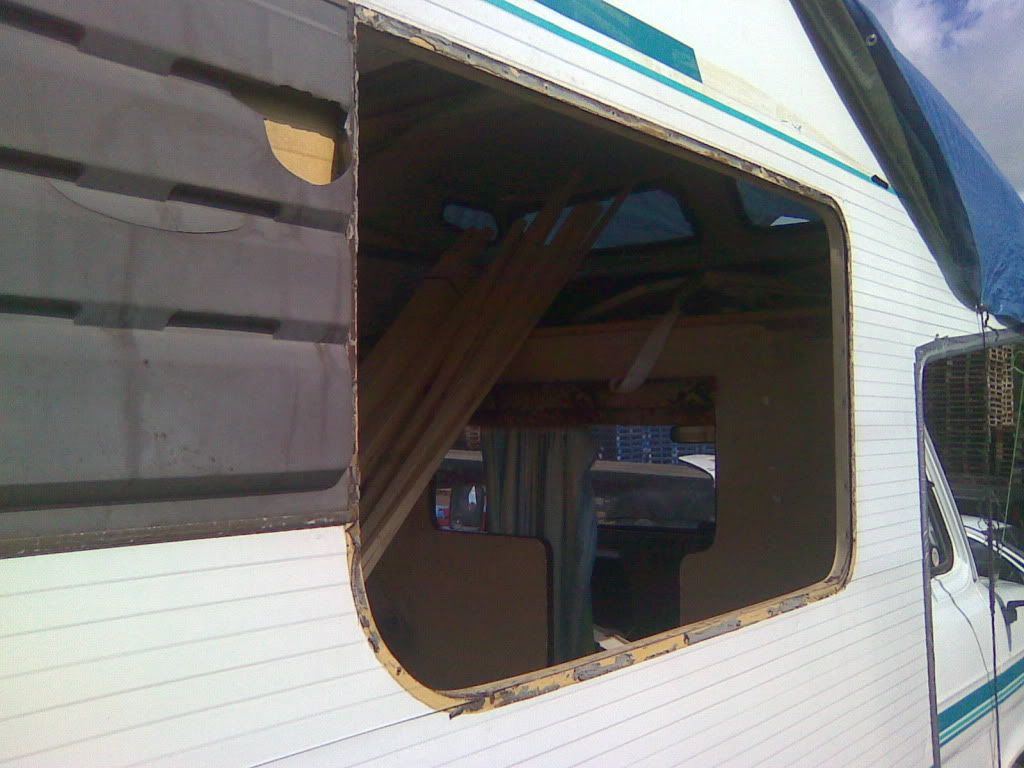
I thought i would start to replace some timber in the window first, so out came the frame

and in went new frame
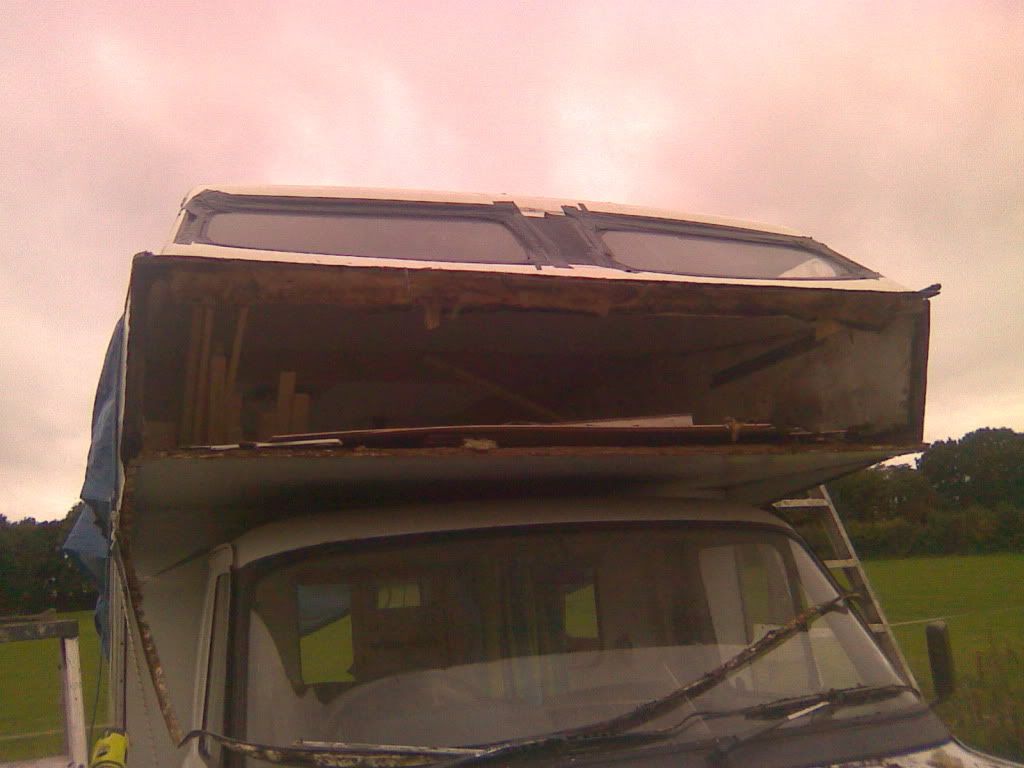
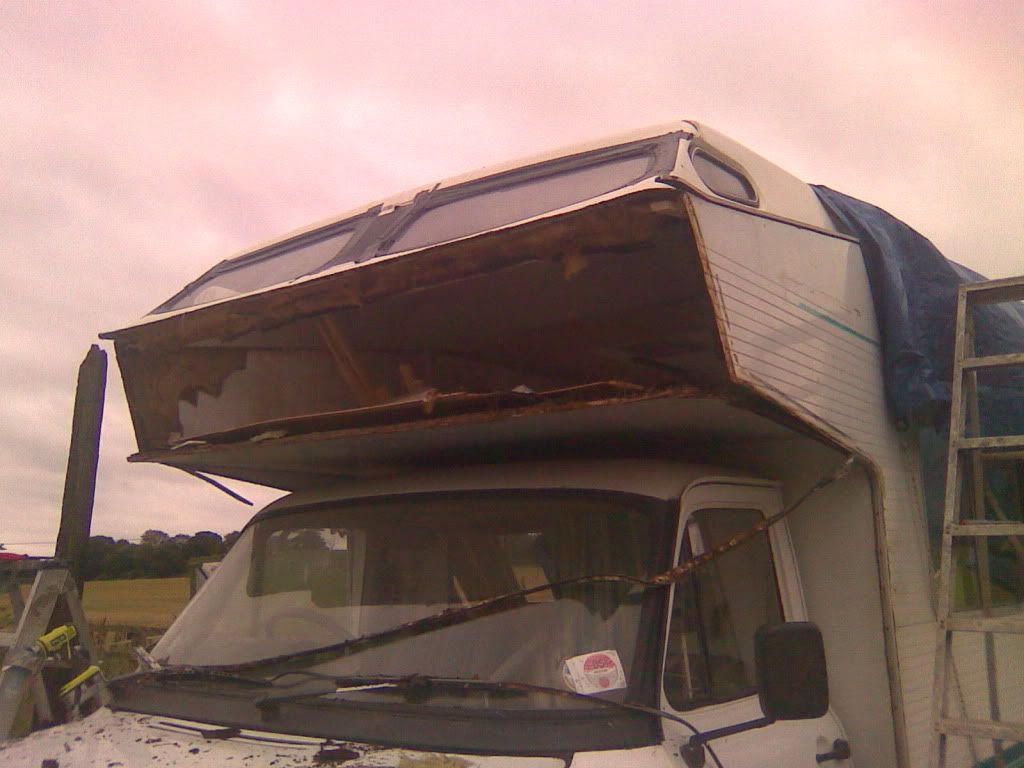
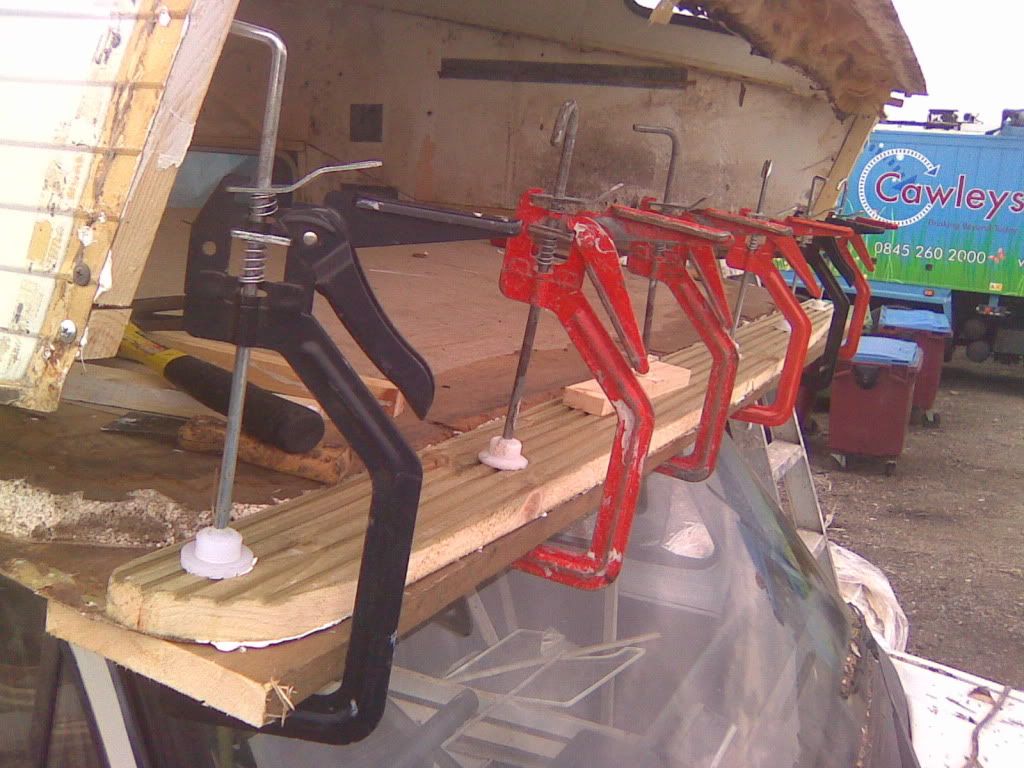
Then i decided to tackle the roof
as you can see there was nothing holding it together apart from the outside trim.
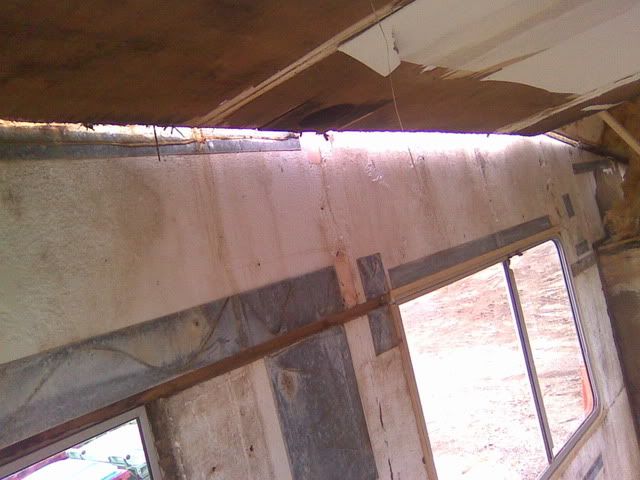
It was really windy and i feared that it would all come down around my ears
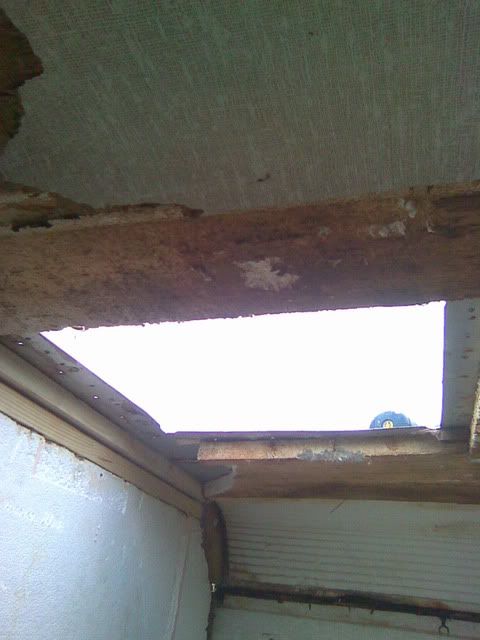
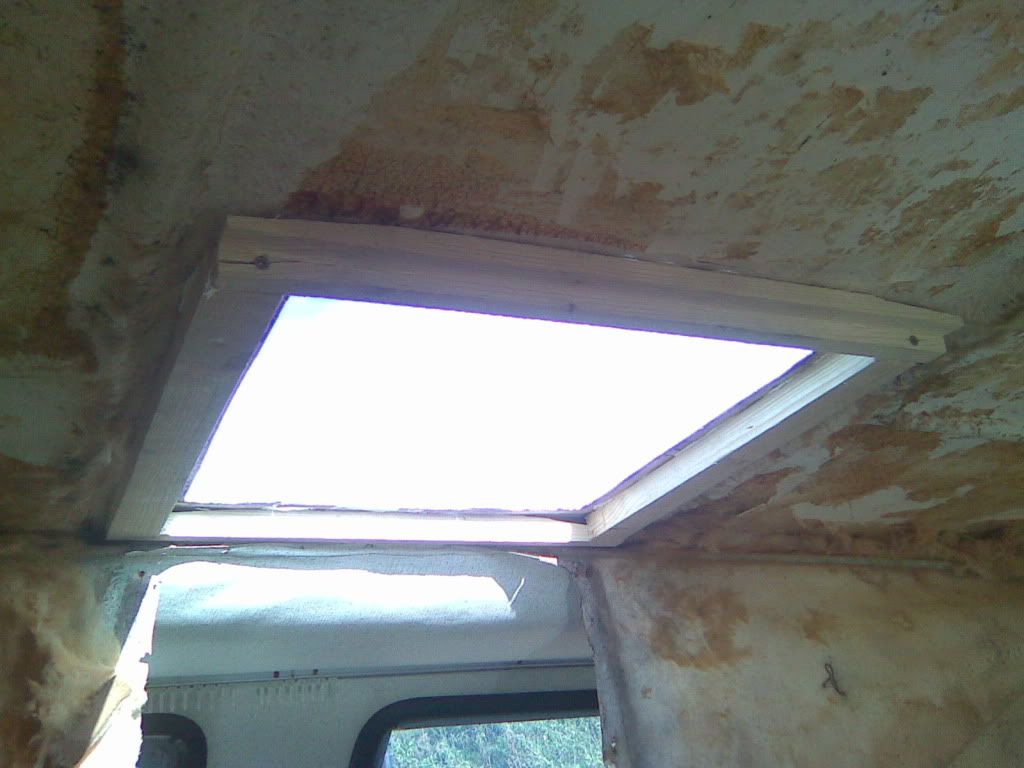
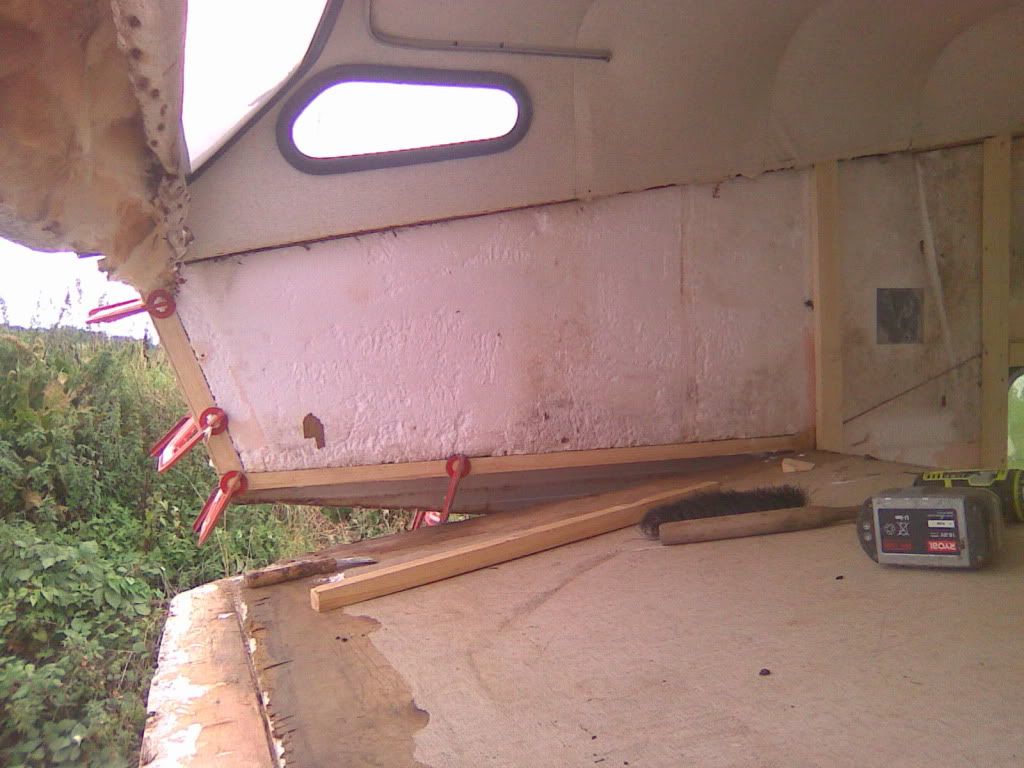
Then the timber around the shower skylight
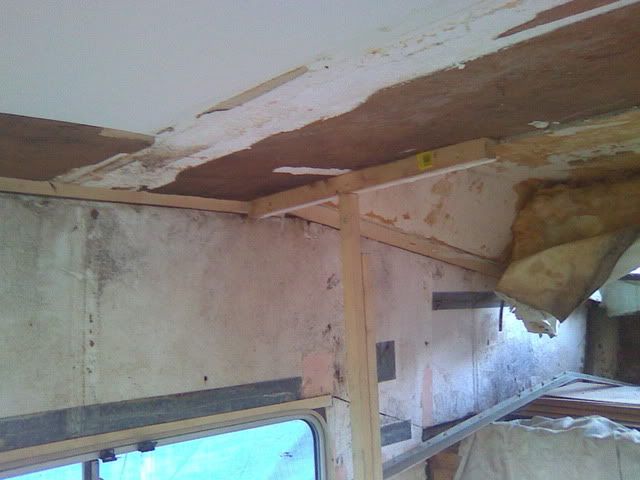
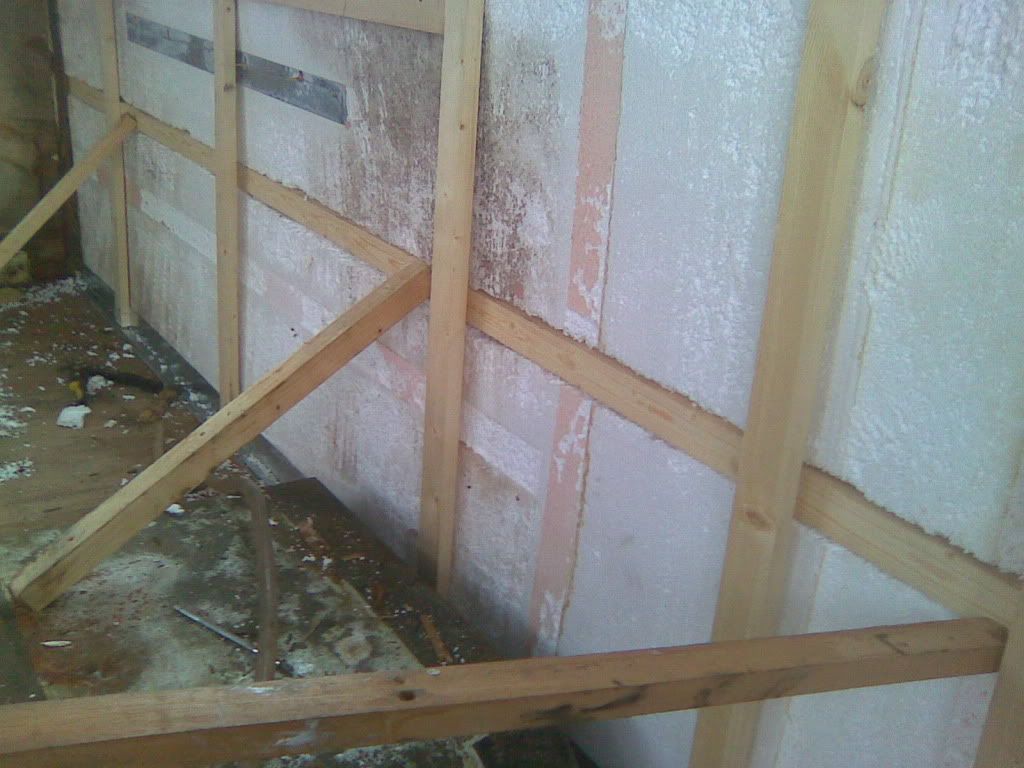
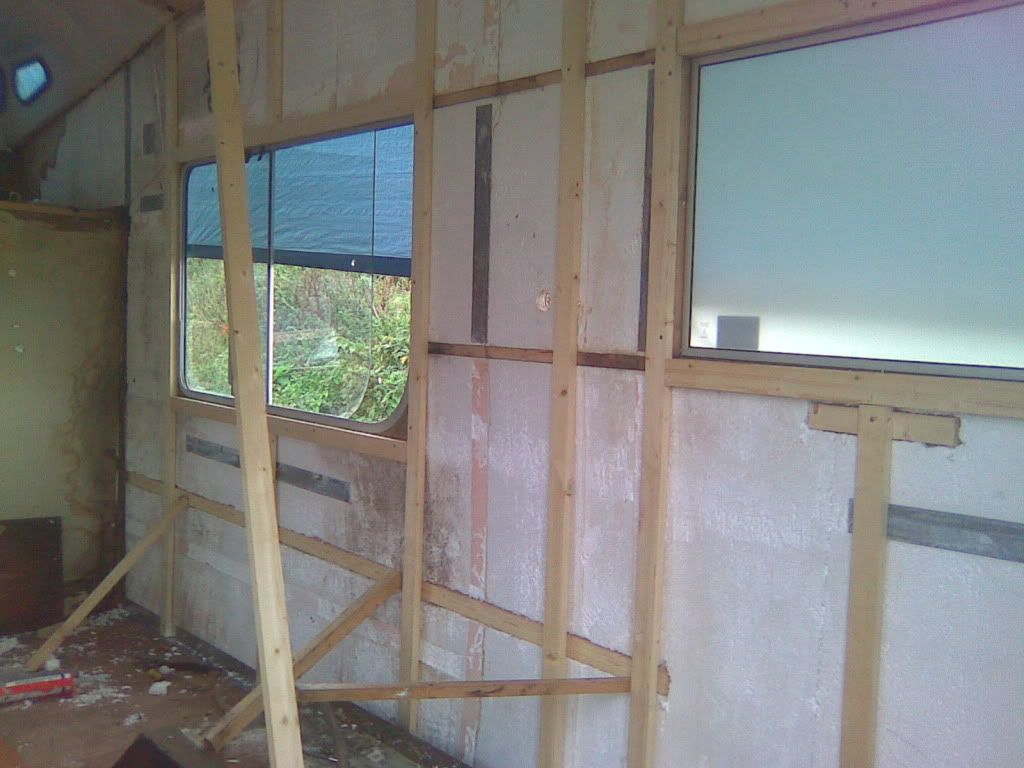
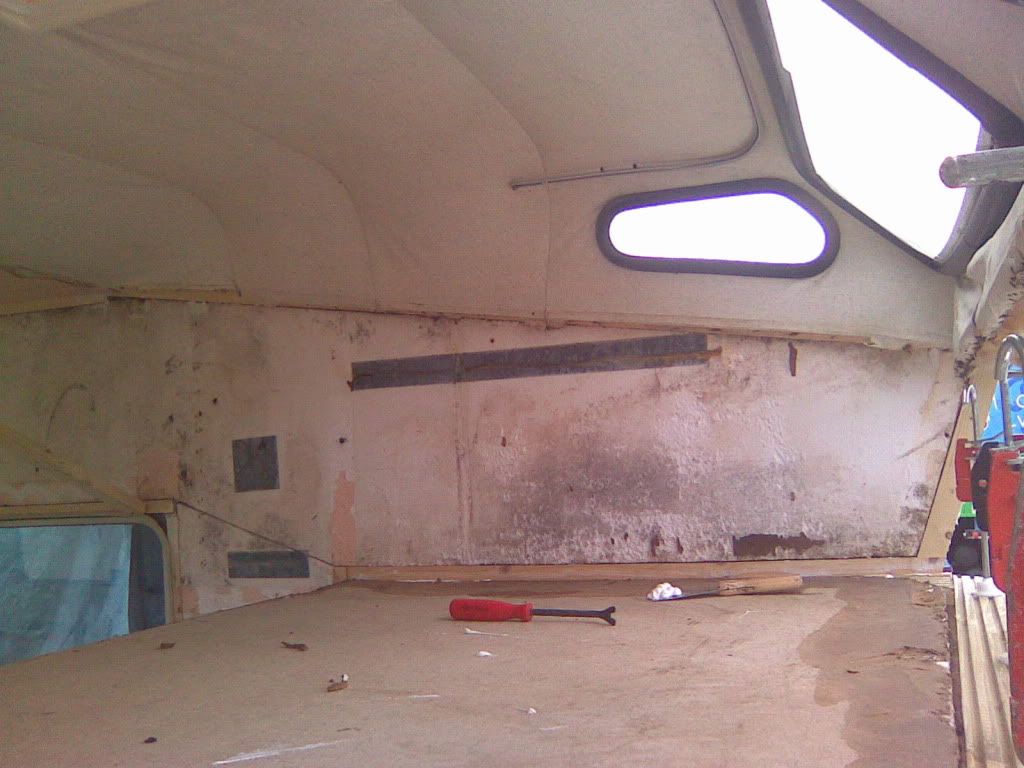
As you can see there is nothing left of the interior
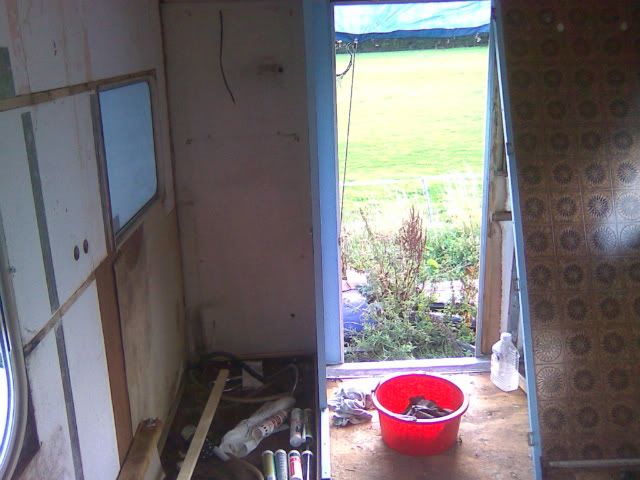
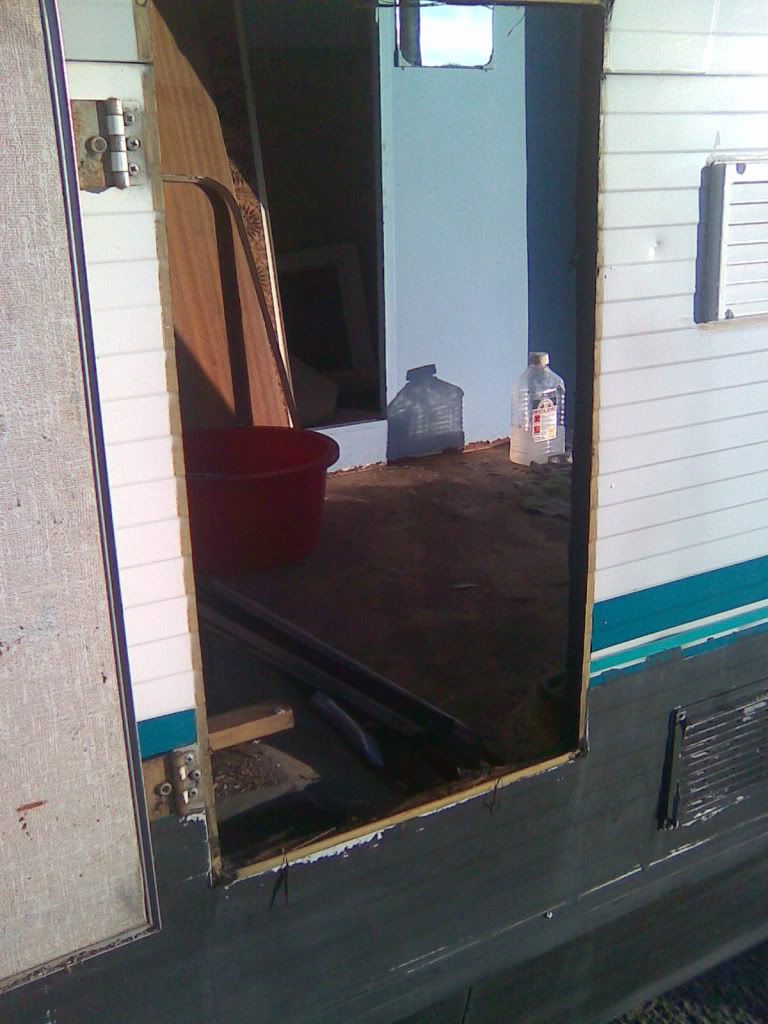
all around the gas locker door is rotten and around the fridge and kitchen window
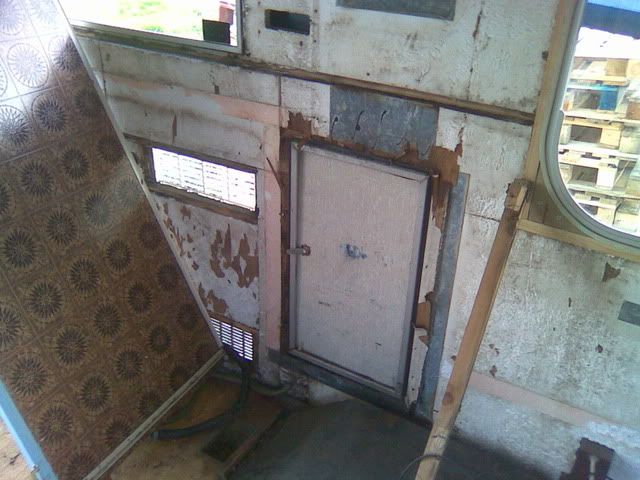
I still have to do all around the luton, then tackle the other window frames etc and skylight in luton, that should then make it water tight and then i can tackle lining the walls.
Where i thought it was leaking from the roof was just the start, there was no good timber running along the length of both sides that hold the wall onto to the roof. So water was just pissing in and every noggin was rotten.
I thought i would start to replace some timber in the window first, so out came the frame
and in went new frame
Then i decided to tackle the roof
as you can see there was nothing holding it together apart from the outside trim.
It was really windy and i feared that it would all come down around my ears
Then the timber around the shower skylight
As you can see there is nothing left of the interior
all around the gas locker door is rotten and around the fridge and kitchen window
I still have to do all around the luton, then tackle the other window frames etc and skylight in luton, that should then make it water tight and then i can tackle lining the walls.
-

davev6newman - Transit Devotee
- Posts: 971
- Joined: Thu Mar 09, 2006 7:57 pm
- Location: Luton
Re: My latest project mk2 CI Travelhome LWB
![]() by madmark » Tue Aug 31, 2010 10:48 pm
by madmark » Tue Aug 31, 2010 10:48 pm
- madmark
- Transit Extremist
- Posts: 15467
- Joined: Thu Mar 03, 2005 4:29 am
Re: My latest project mk2 CI Travelhome LWB
![]() by davev6newman » Wed Sep 01, 2010 8:29 pm
by davev6newman » Wed Sep 01, 2010 8:29 pm
Is it brave or just plain stupid???
-
davev6newman - Transit Devotee
- Posts: 971
- Joined: Thu Mar 09, 2006 7:57 pm
- Location: Luton
Re: My latest project mk2 CI Travelhome LWB
![]() by davev6newman » Tue Sep 07, 2010 7:49 pm
by davev6newman » Tue Sep 07, 2010 7:49 pm
Decided to tackle a couple more window frames this week and a bit more timberwork.
This was the kitchen window, the putty had dried out so i scraped it all off and replaced with non setting bedding mastic,
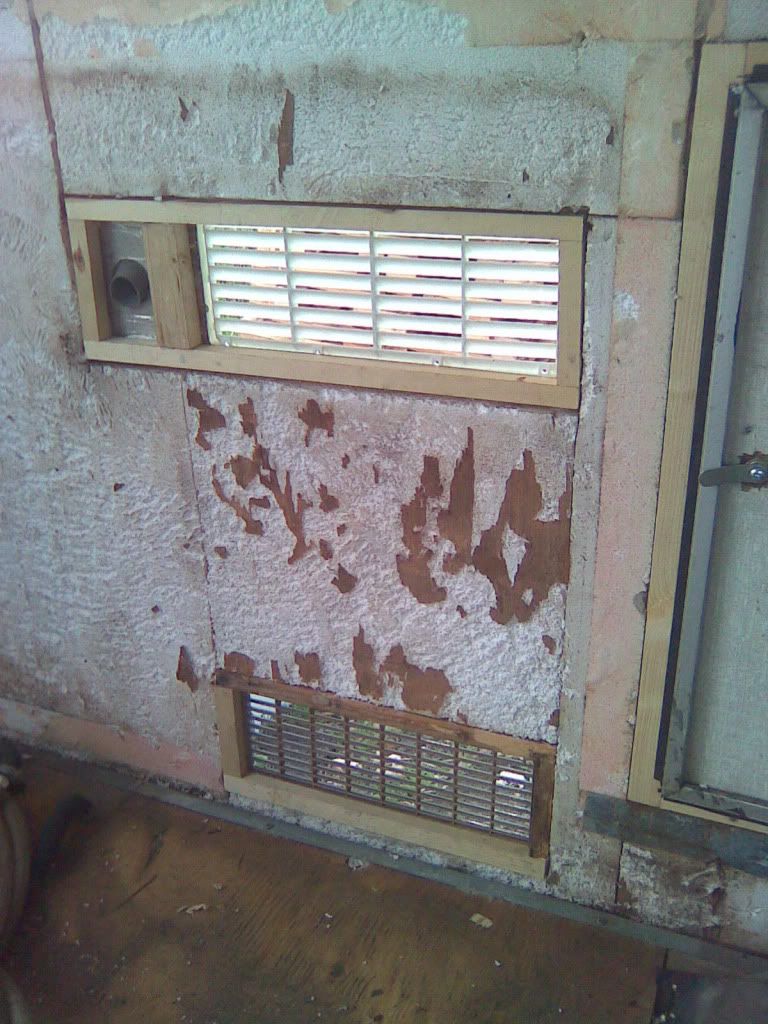
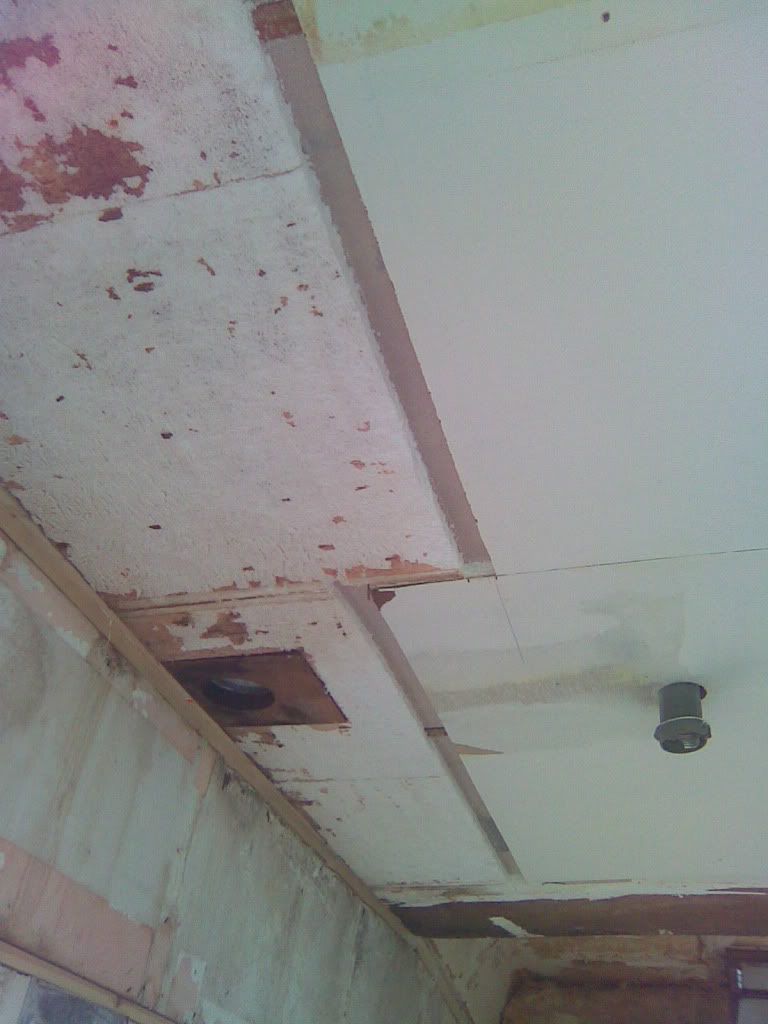
The gas locker frame and the gas fridge vents were rotten so they had to be replaced
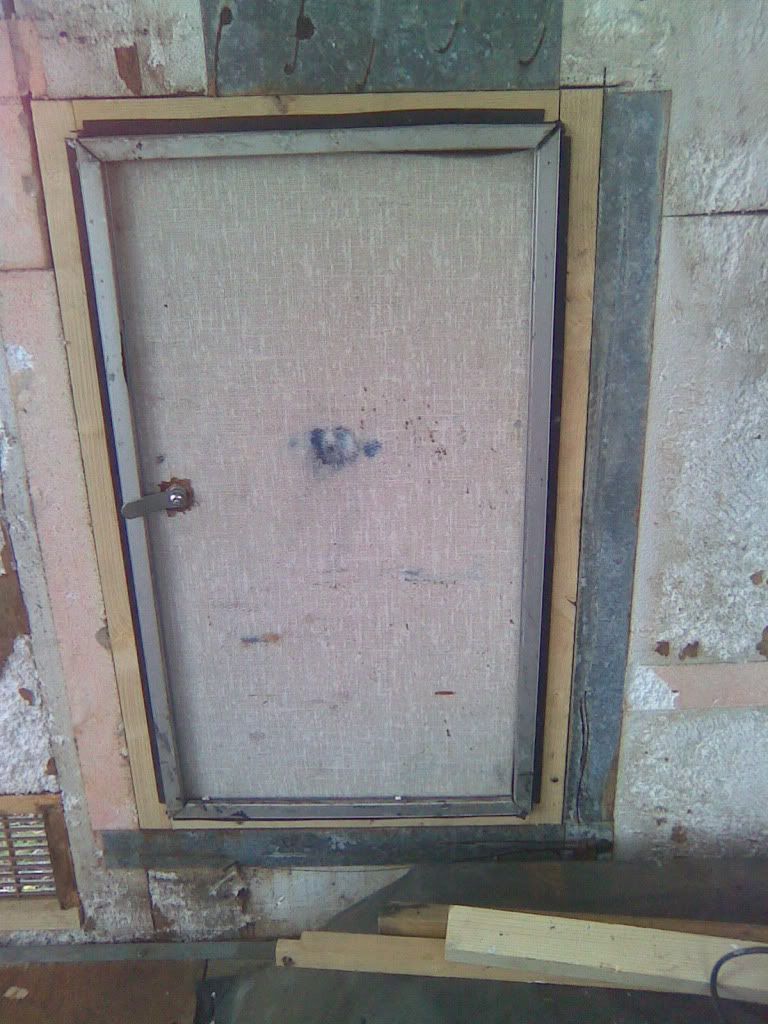
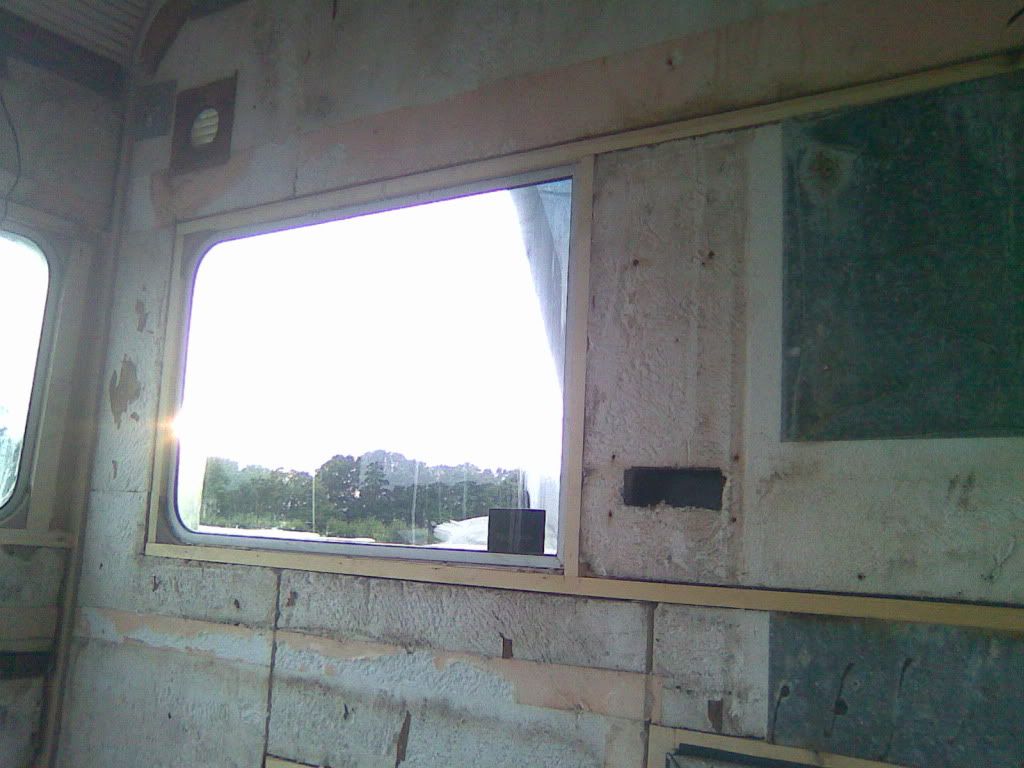
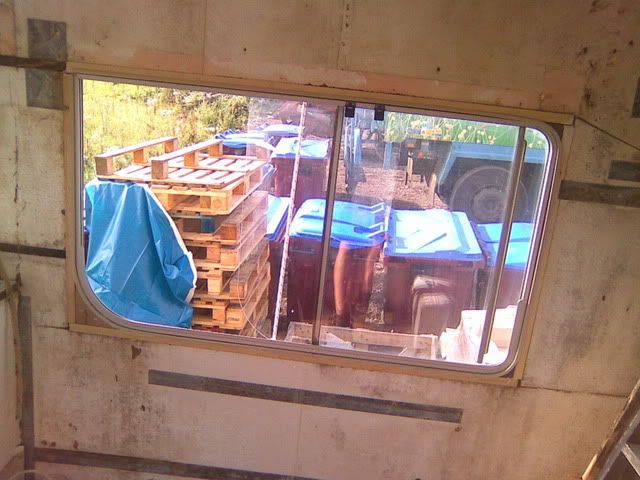
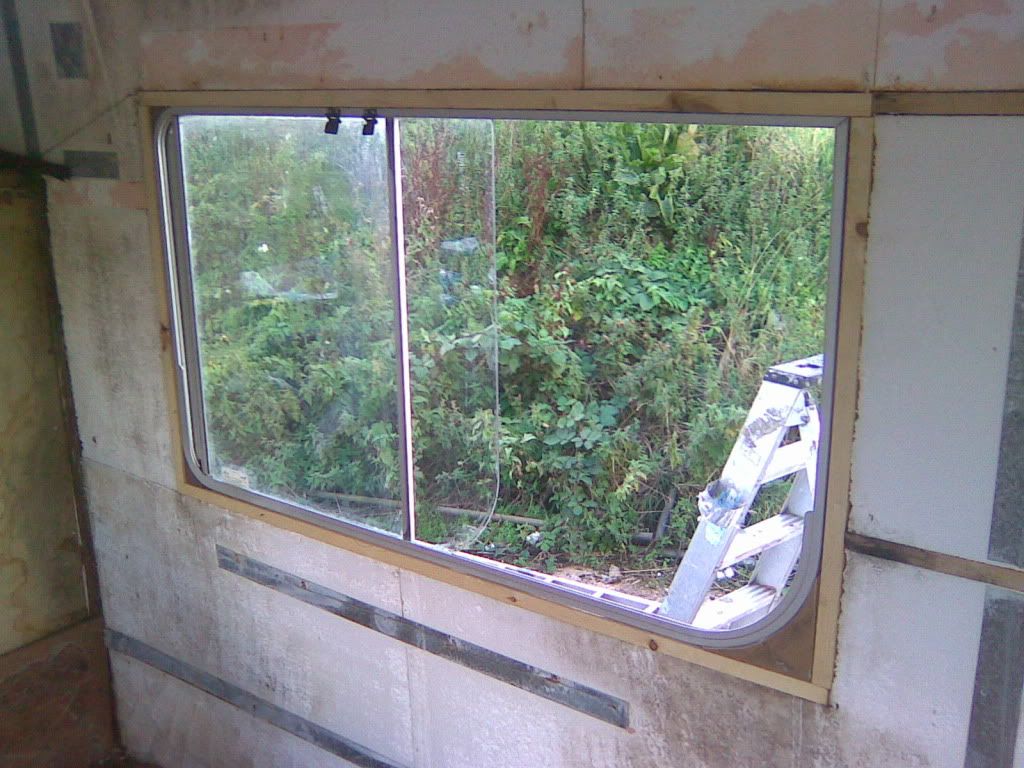
New frame in kitchen window and new frame in rear wall window

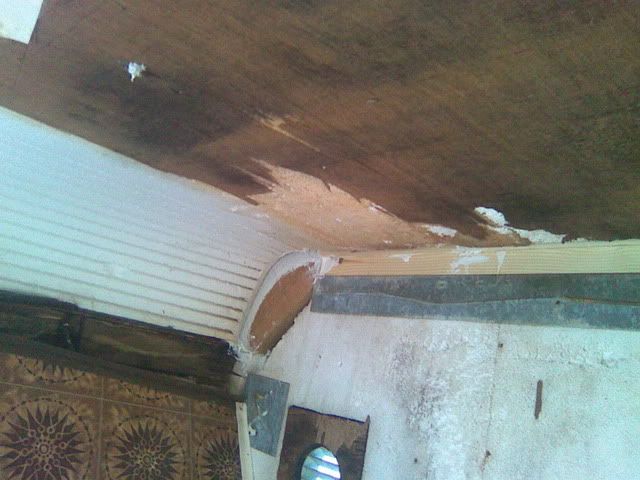
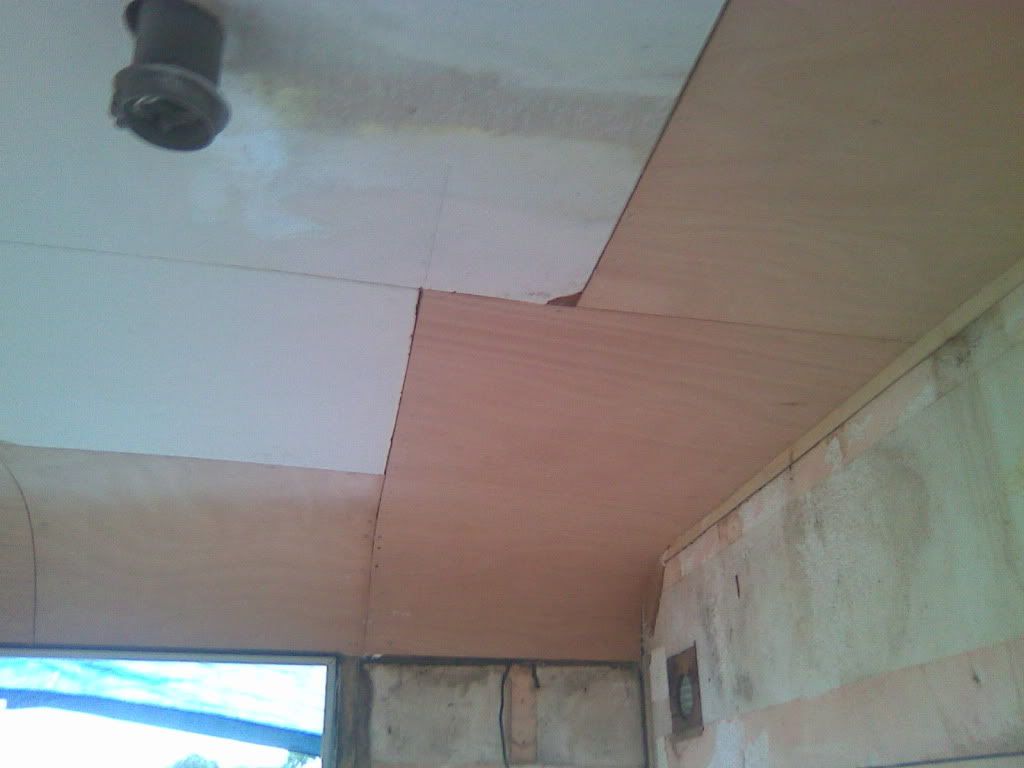
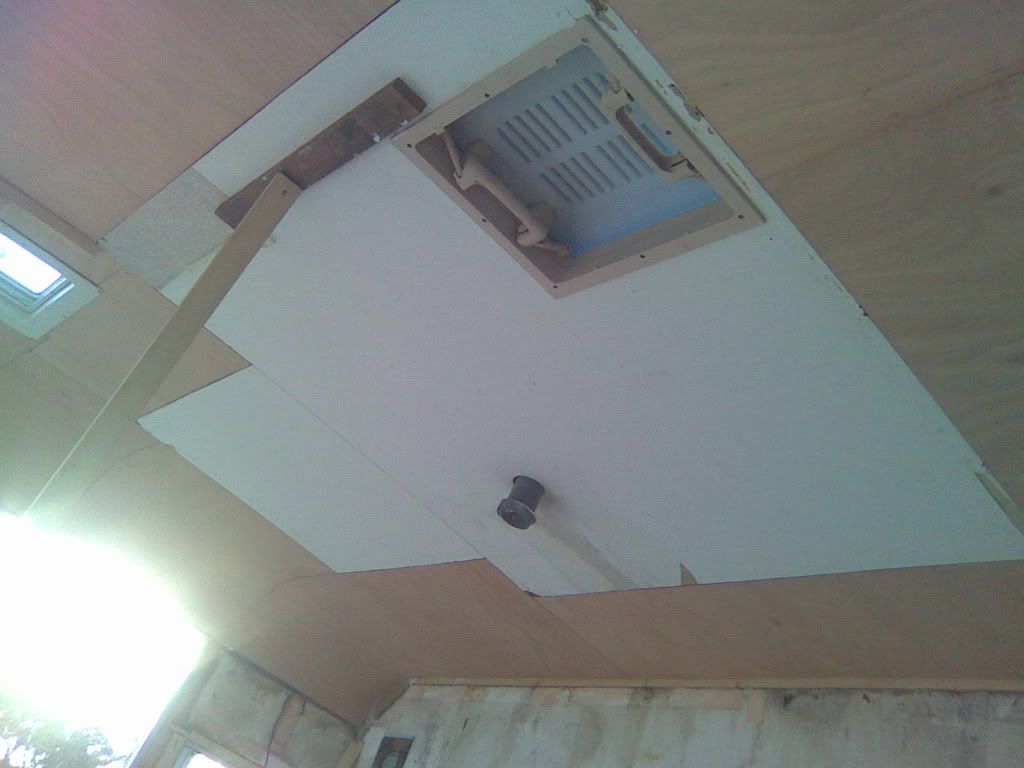
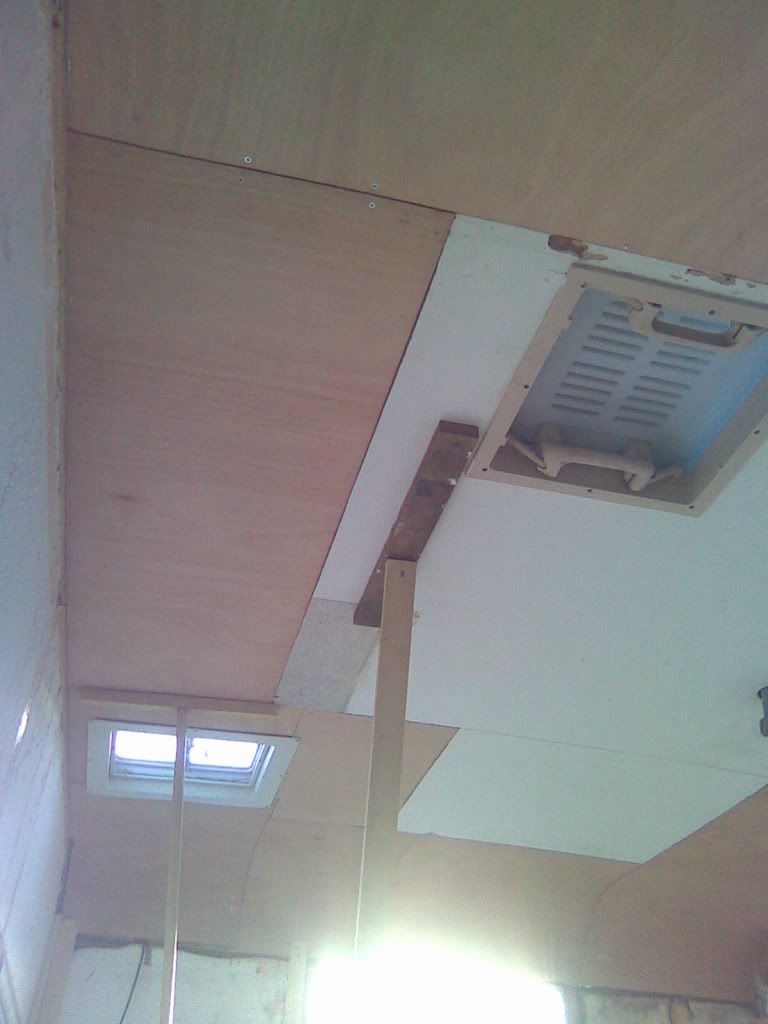
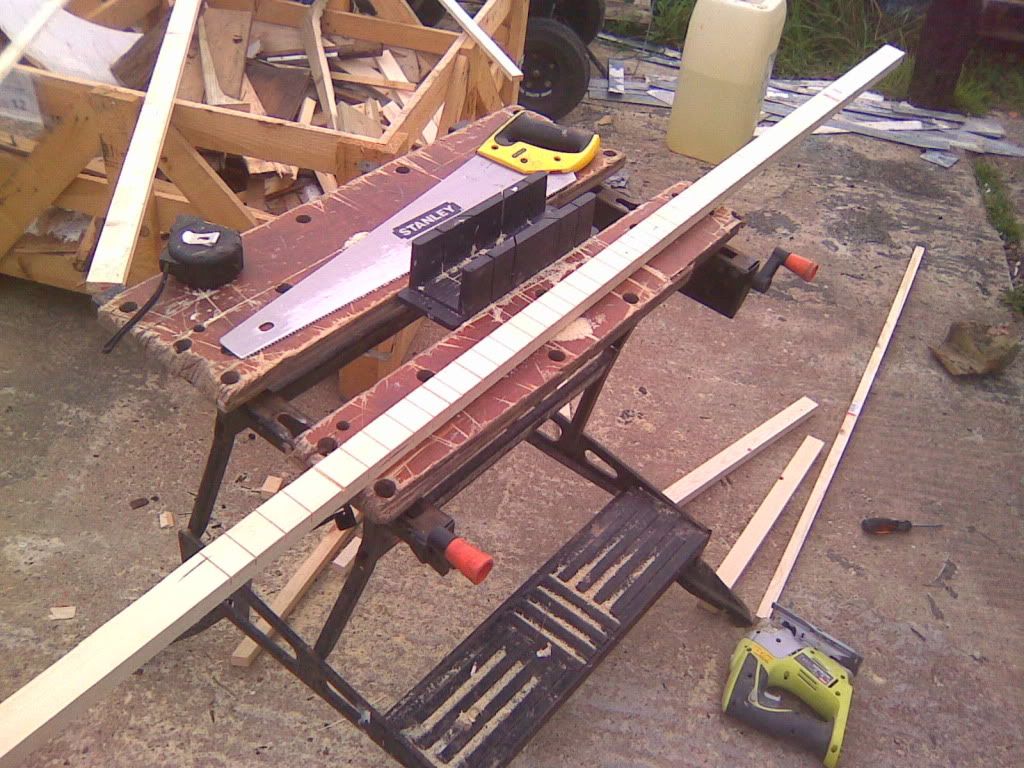
I wanted to tidy the ceiling up so i cut back to good timber with a battery skill saw and then cut the polystyrene back and stuck new battons to roof with evo stick, this was because i never had enough tollerance to use bonding adhesive.
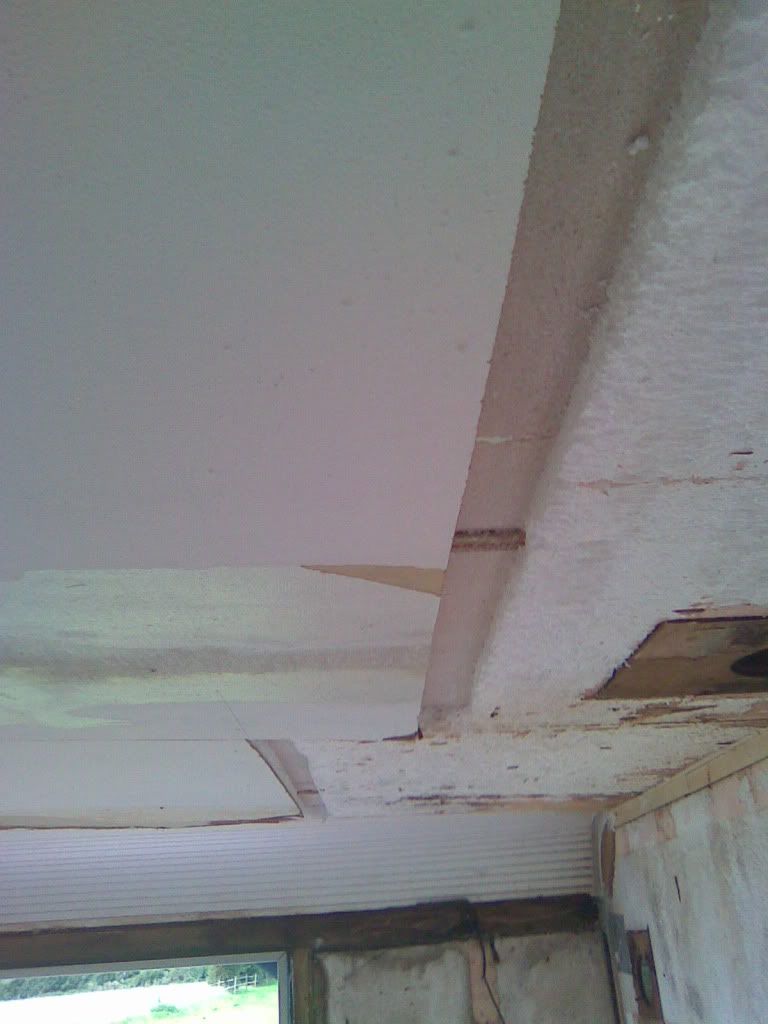
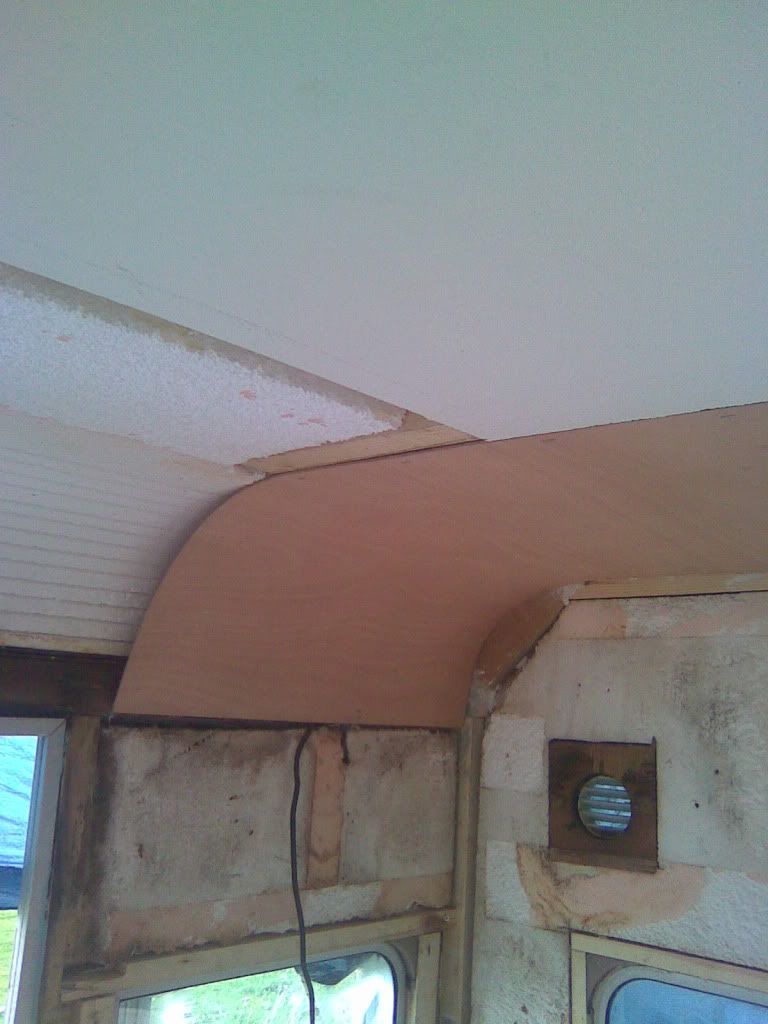
I manage to buy some odd sizes of 3mm plywood that was just right for patching in the ceiling and forming the curve on the back wall
I also took down the toilet wall and removed the remaining sodden ply, the shower tray was full of holes, so that had to go, i will probally just make it a washroom and toilet now. The prop you can see is needed as the toilet wall was taking a lot of the ceiling weight.
Also the galley area had a slight return on it and this was also to support the roof, so i will need to replace that.
This was the kitchen window, the putty had dried out so i scraped it all off and replaced with non setting bedding mastic,
The gas locker frame and the gas fridge vents were rotten so they had to be replaced
New frame in kitchen window and new frame in rear wall window
I wanted to tidy the ceiling up so i cut back to good timber with a battery skill saw and then cut the polystyrene back and stuck new battons to roof with evo stick, this was because i never had enough tollerance to use bonding adhesive.
I manage to buy some odd sizes of 3mm plywood that was just right for patching in the ceiling and forming the curve on the back wall
I also took down the toilet wall and removed the remaining sodden ply, the shower tray was full of holes, so that had to go, i will probally just make it a washroom and toilet now. The prop you can see is needed as the toilet wall was taking a lot of the ceiling weight.
Also the galley area had a slight return on it and this was also to support the roof, so i will need to replace that.
-
davev6newman - Transit Devotee
- Posts: 971
- Joined: Thu Mar 09, 2006 7:57 pm
- Location: Luton
Re: My latest project mk2 CI Travelhome LWB
![]() by mk2panelvan » Thu Sep 09, 2010 10:12 am
by mk2panelvan » Thu Sep 09, 2010 10:12 am
Seen this on ebay, might help you out with fittings
http://cgi.ebay.co.uk/Mk2-transit-Campe ... 5312wt_930
http://cgi.ebay.co.uk/Mk2-transit-Campe ... 5312wt_930
If at first you don't succeed, remove all evidence you ever tried
http://uk.geocities.com/thenandnowkillingbeck/
http://uk.geocities.com/thenandnowkillingbeck/
-

mk2panelvan - Transit Aficionado

- Posts: 483
- Joined: Mon Jun 13, 2005 5:16 pm
- Location: Cumbria
Re: My latest project mk2 CI Travelhome LWB
![]() by Chaz&Saz » Thu Sep 09, 2010 5:38 pm
by Chaz&Saz » Thu Sep 09, 2010 5:38 pm
Great work.
I shall be watching this with interest
I shall be watching this with interest
1972 Built, 1973 Registered, Land Liner V6
1967 Triumph Herald - Bethany
1976 Triumph Dolomite
1967 Triumph Herald - Bethany
1976 Triumph Dolomite
-

Chaz&Saz - Transit Aficionado
- Posts: 234
- Joined: Sun Jan 18, 2009 6:18 pm
- Location: Northampton
Re: My latest project mk2 CI Travelhome LWB
![]() by davev6newman » Thu Sep 09, 2010 8:23 pm
by davev6newman » Thu Sep 09, 2010 8:23 pm
Thanks for that. I just chucked an interior away like that, and who ever removes that one will find the same trouble i did with damp and the units just falling apart. I am going to buy a caravan and swap interiors from that.
-
davev6newman - Transit Devotee
- Posts: 971
- Joined: Thu Mar 09, 2006 7:57 pm
- Location: Luton
Re: My latest project mk2 CI Travelhome LWB
![]() by The Docmeister » Thu Sep 09, 2010 9:56 pm
by The Docmeister » Thu Sep 09, 2010 9:56 pm
Very impressive stuff indeed!
It's almost inspired me to get back on with our camper. Can't wait for the next installment.
It's almost inspired me to get back on with our camper. Can't wait for the next installment.
-

The Docmeister - Transit Aficionado
- Posts: 136
- Joined: Tue Jan 16, 2007 2:38 am
- Location: Glasgow
Re: My latest project mk2 CI Travelhome LWB
![]() by davev6newman » Tue Sep 14, 2010 8:40 pm
by davev6newman » Tue Sep 14, 2010 8:40 pm
I got quite a bit done this week, and its starting to take shape....slowly!
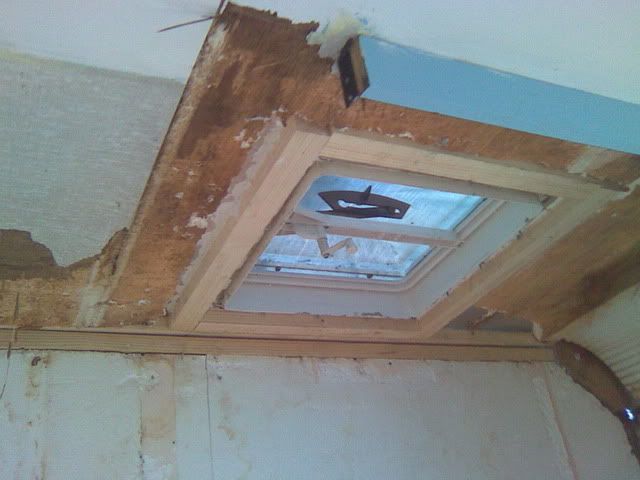
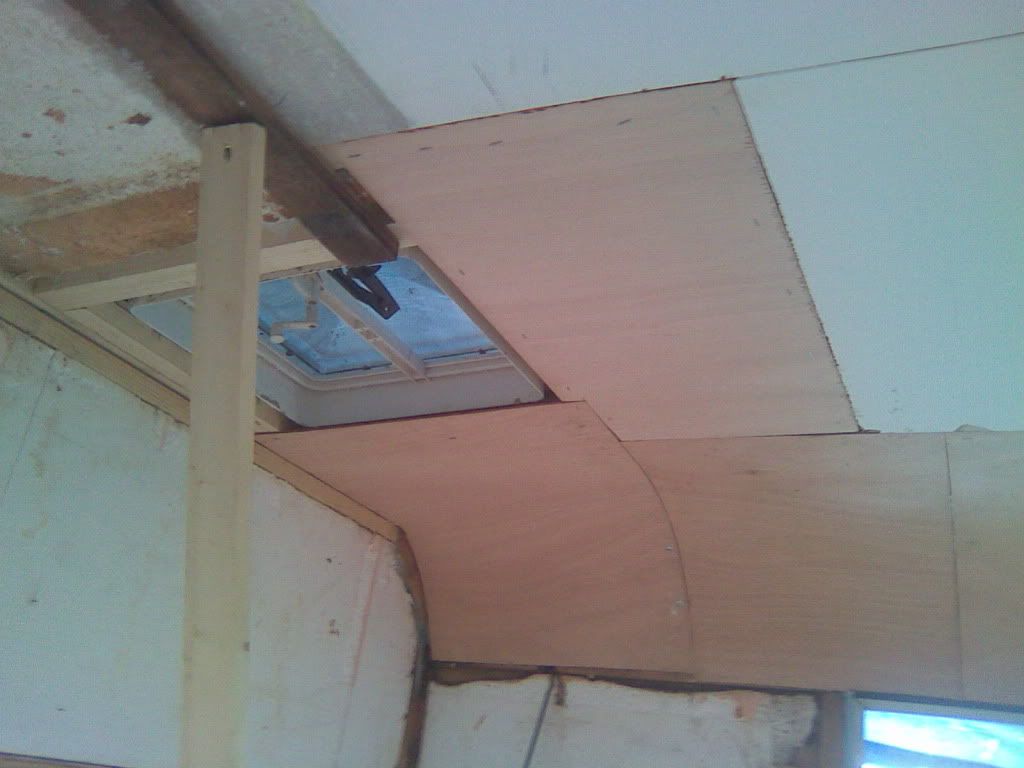
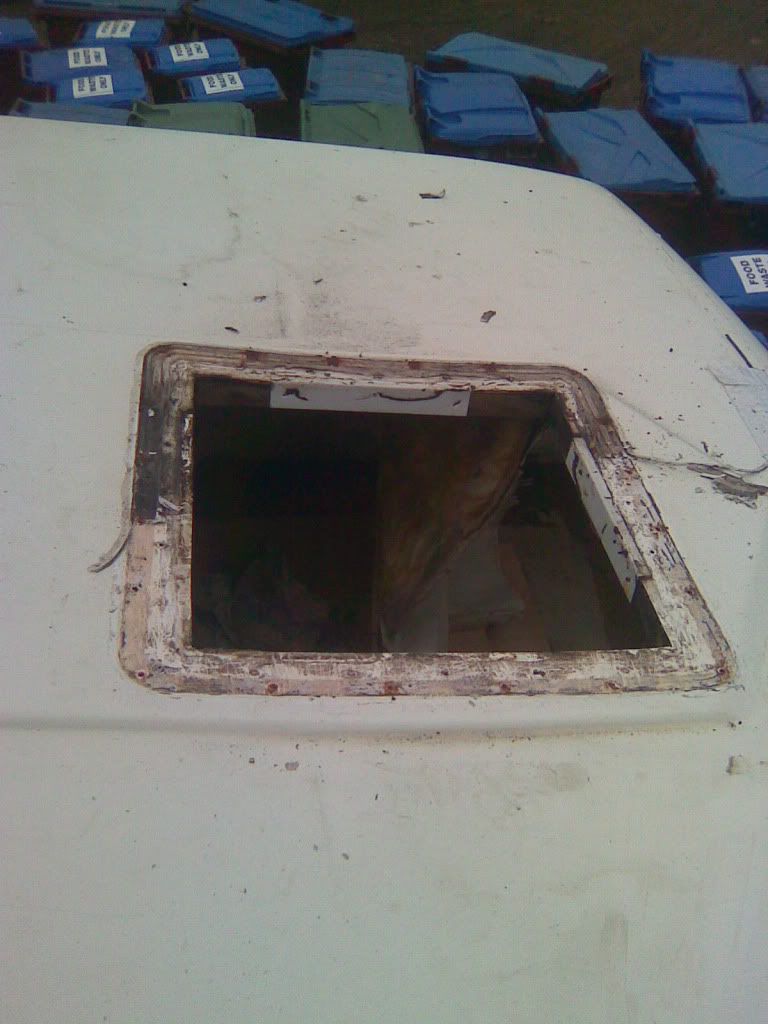
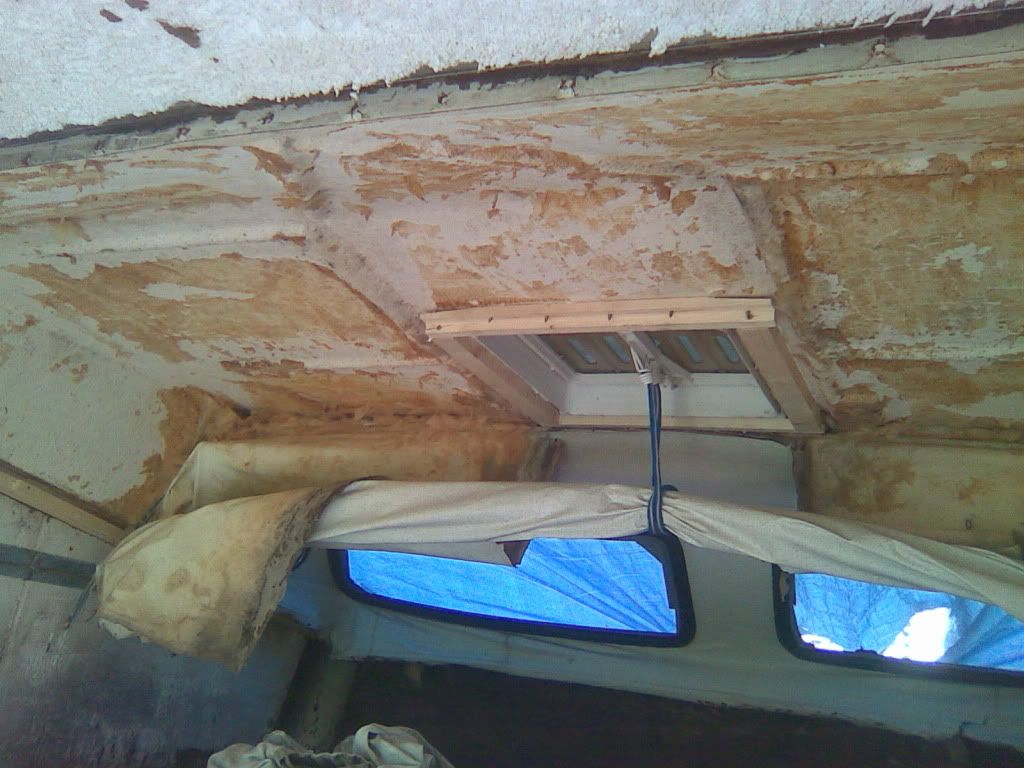
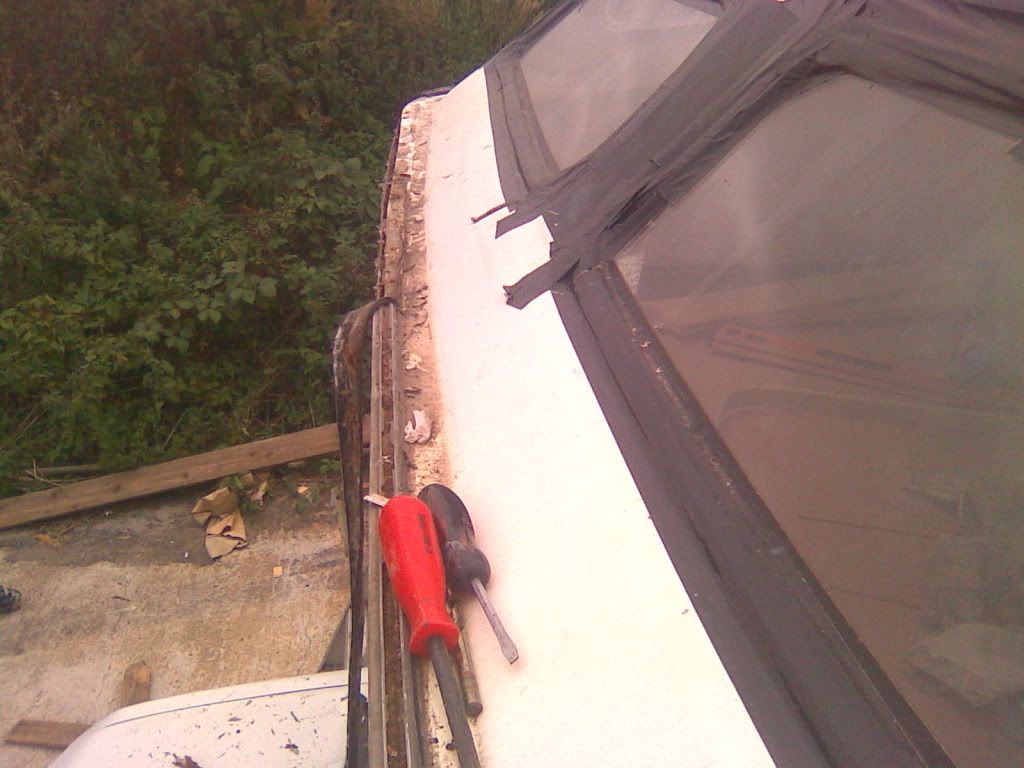
The skylight in the luton was the first task as it was leaking badly, usual problem of the mastic tape going hard and allowing water in.
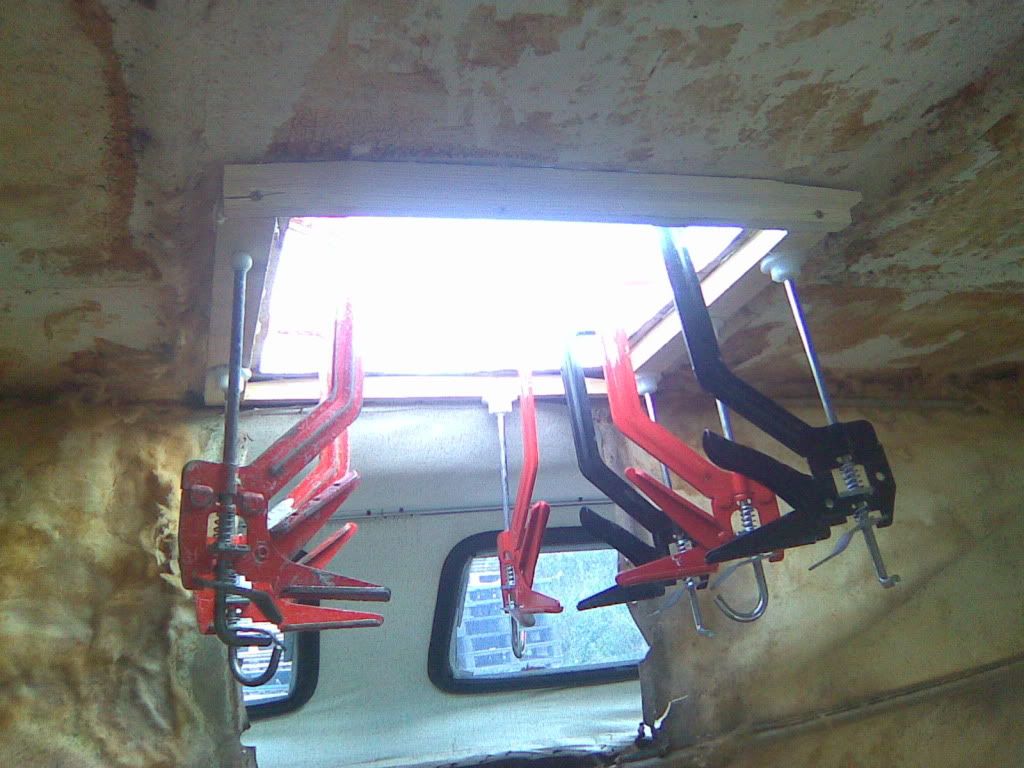
The frame work was rotten so i replaced with slightly wider timber as the skylight was a replacement unit and all the screw were just biting on the fibreglass.
Once that was done i needed to replace the last window frame in the living area
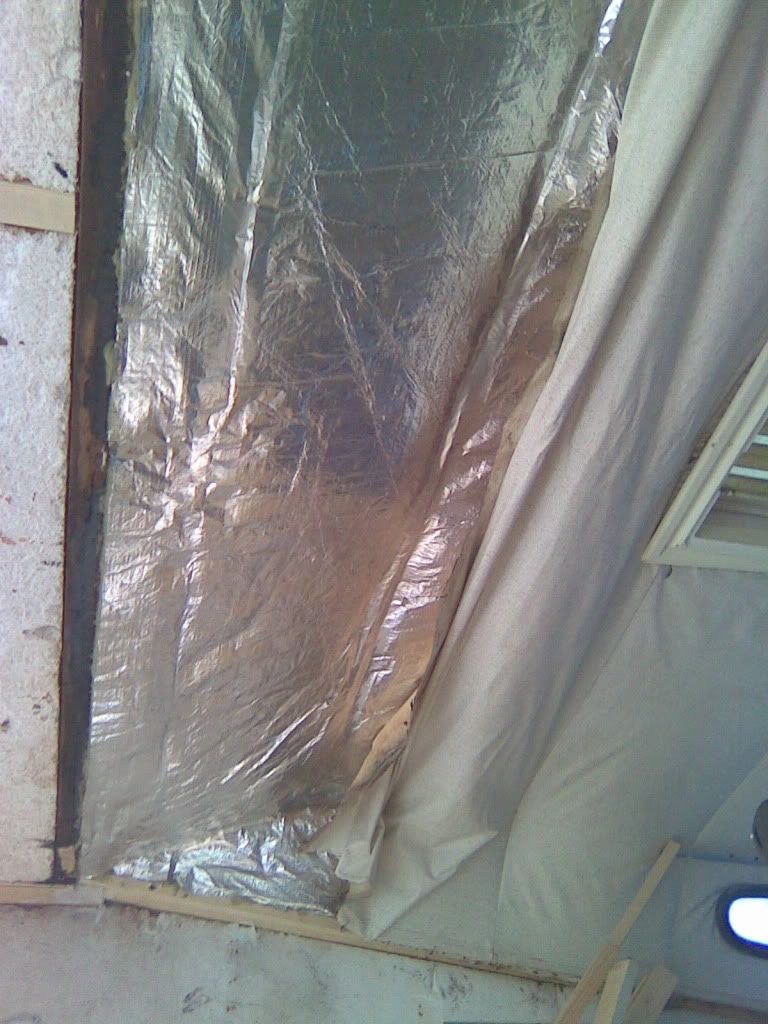
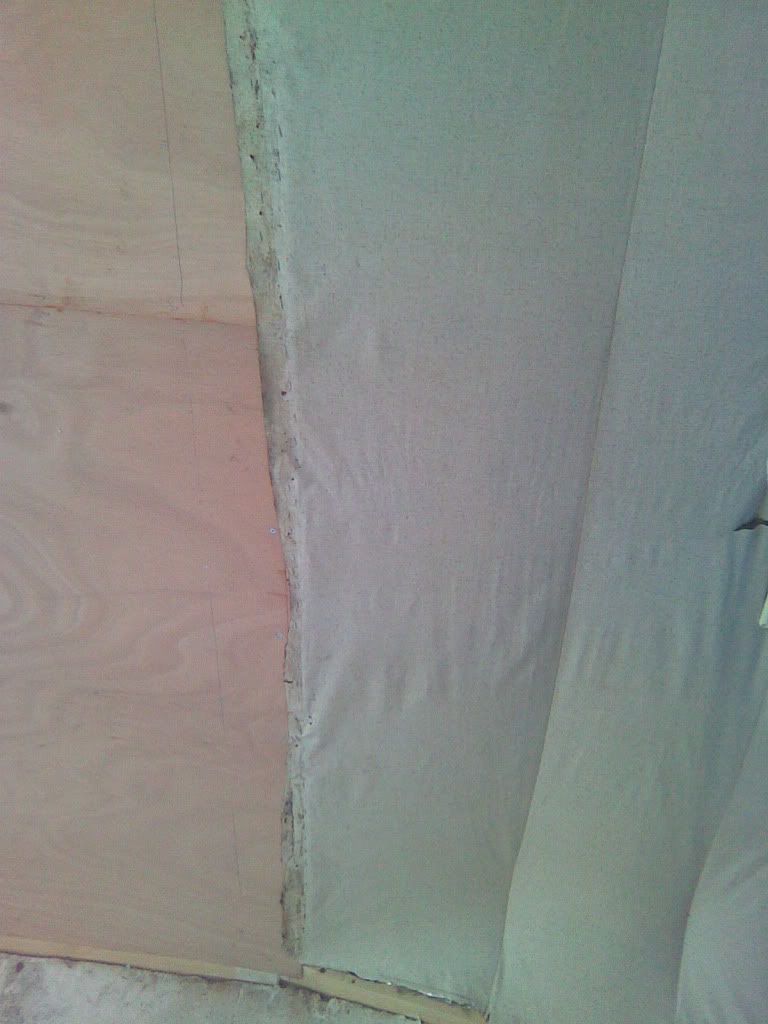
I now tackled the roof lining in the luton, i got some foiled lined insulation from work and stuck it the ceiling with spray glue
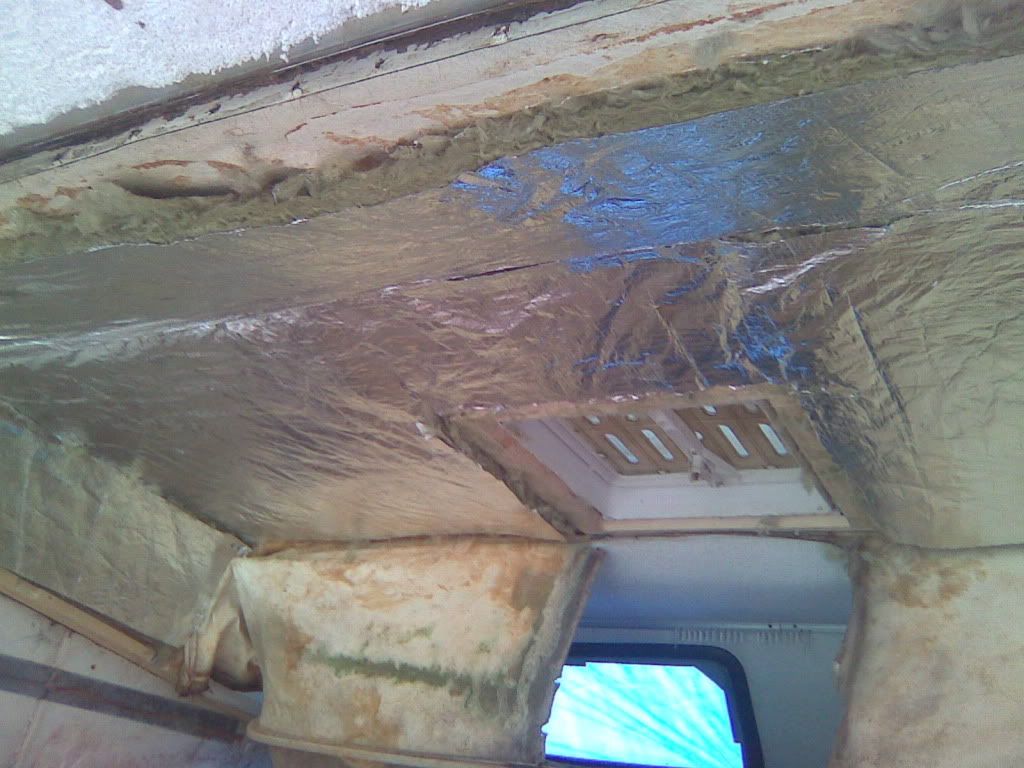
After fitting new new support timbers for headlining i could refit the bars and stretch the lining back into shape, stapling as i went. The lining is not in the best condition so i am going to get some fabric and just patch over the bad bits
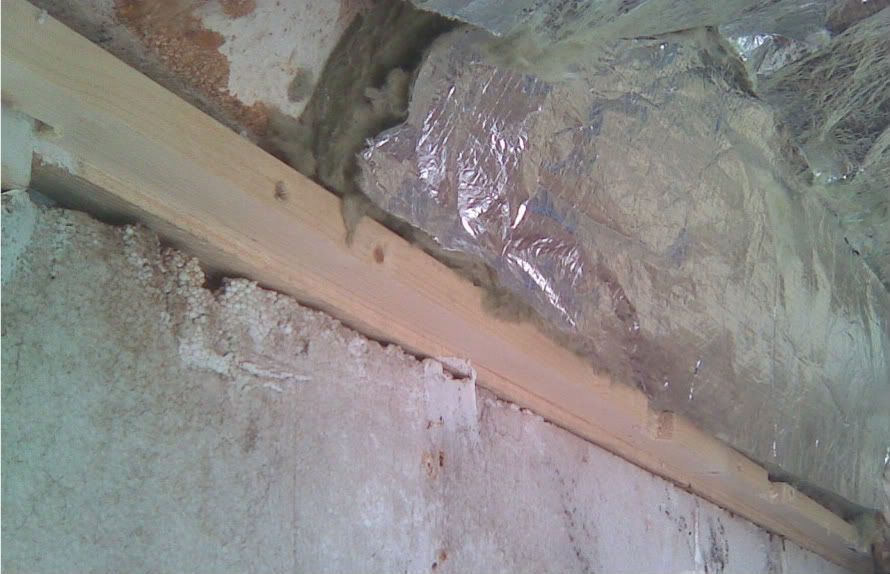
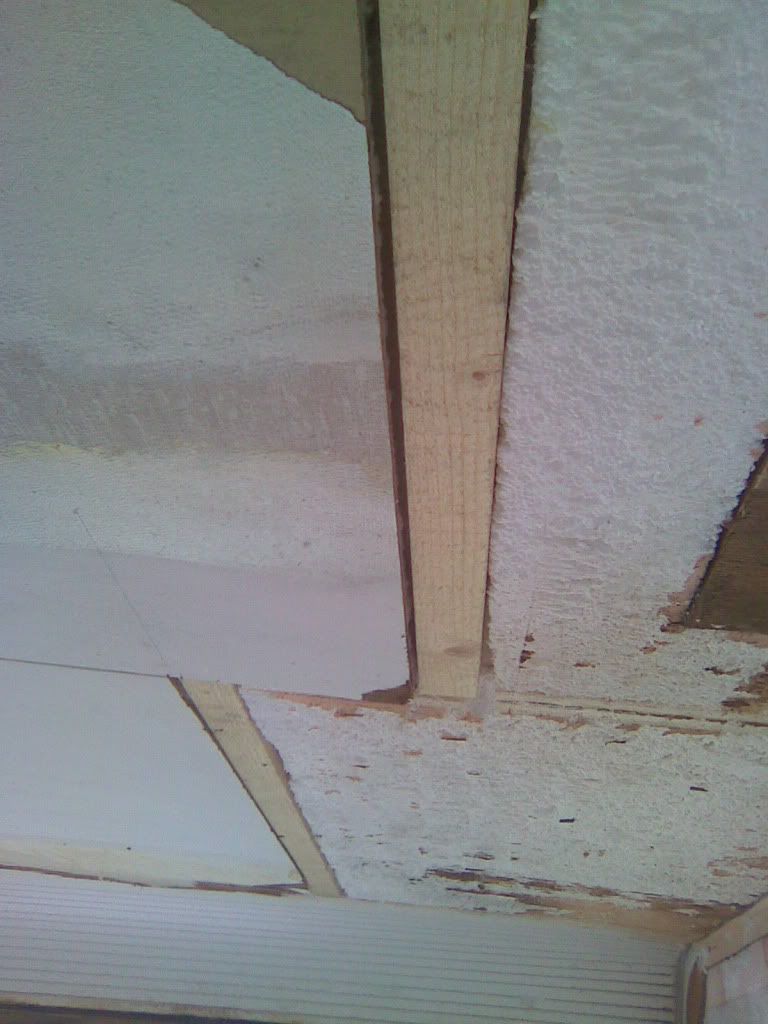
Where the fibreglass roof met the aluminium roof there was a timber spanning across the whole ceiling that i had to take down as the ends were rotten. I didnt want to replace this, as it was shaped to fit and it had the right profile, so i put it back with plenty of mastic and just repaired the ends.
I did however need to put an extra timber in adjacent to this one to replace the ceiling ply. I had to cut grooves in the wood so it would bend to the shape of the roof. I cut the polysyrene back and used contact adhesive to fix.
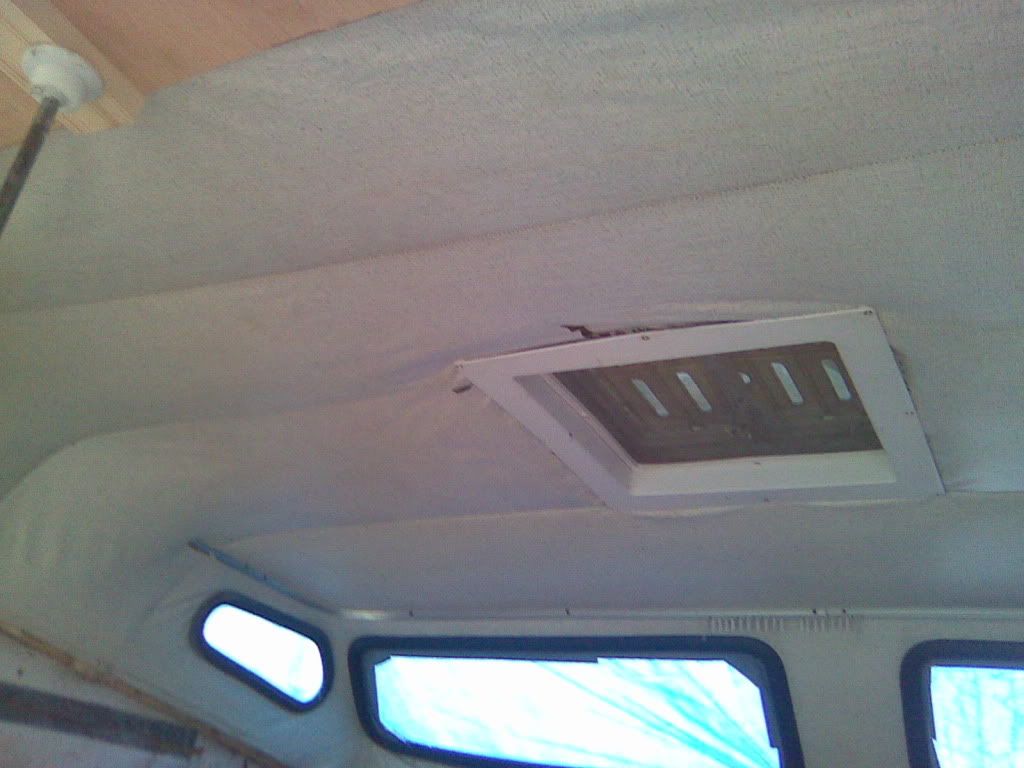
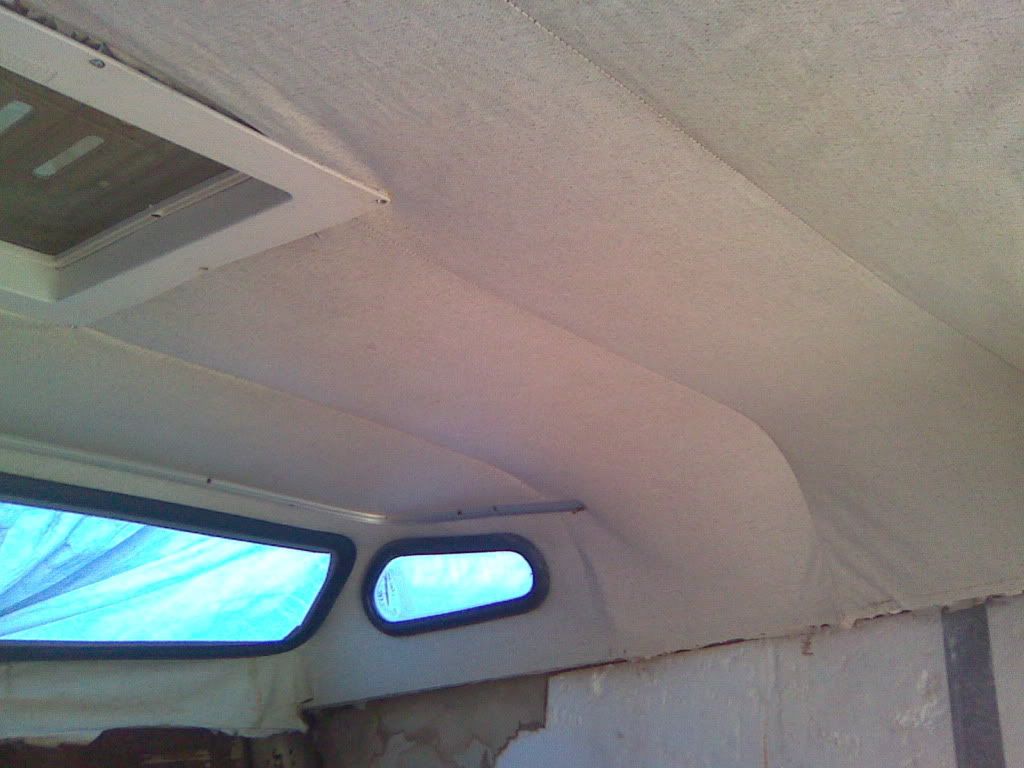
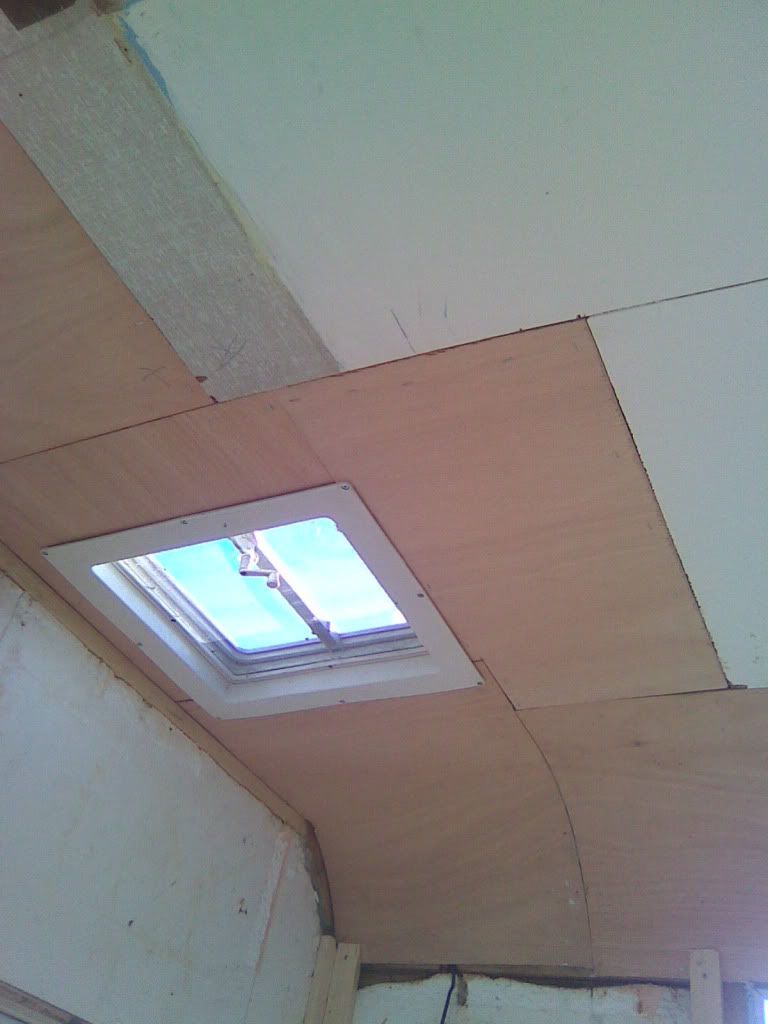
Once i done that i fixed some new ply to the ceiling and stretch the rest of the headlining in place.
Now to finish the rest of the ceiling and skylight trim in the toilet area
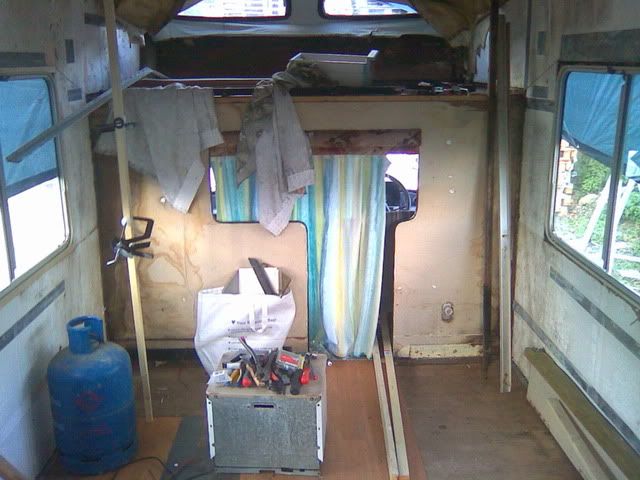
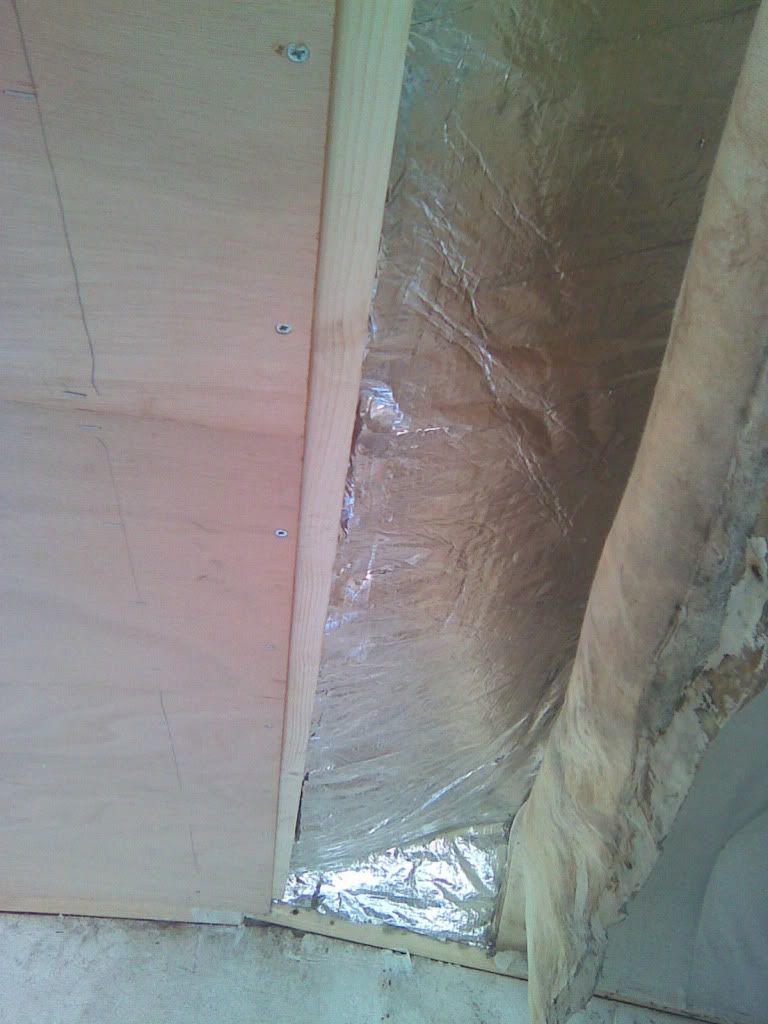
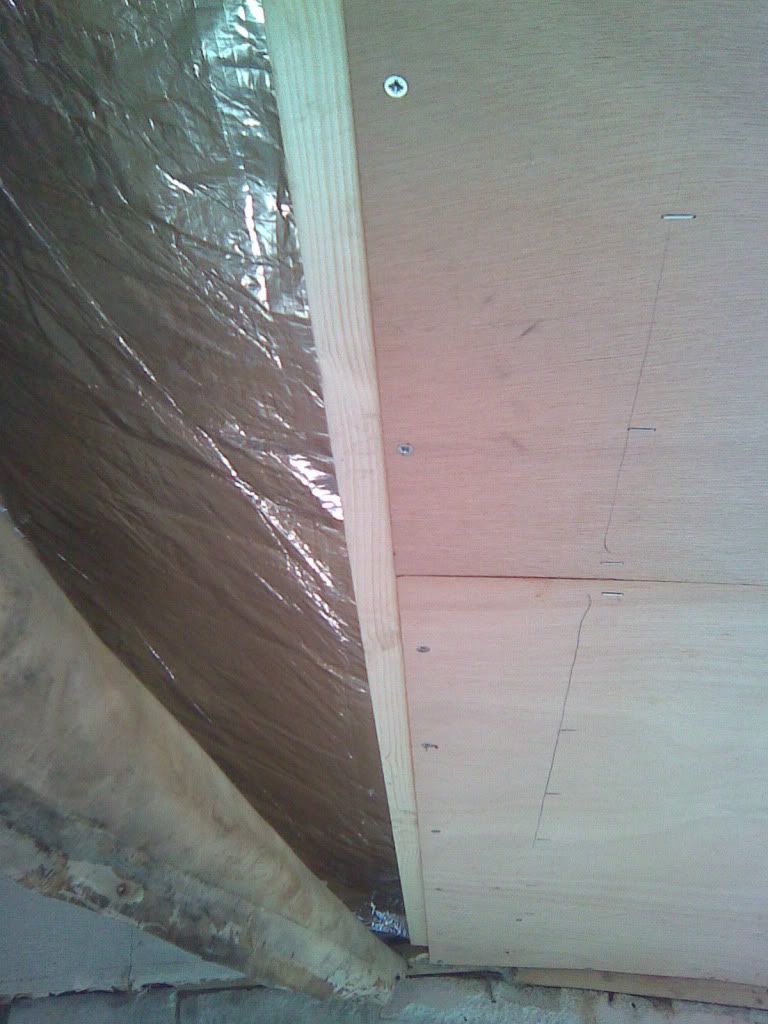
I could now start to strengthen the walls. I wasnt going to try and stick 3mm ply back to polystyrene or stick loads of noggins in and rely on glue to keep the strength.
So after measuring the width of the van i realised i had plenty of room to batten in front of the poly and fix 6mm ply to that. This would also anable me to be able to fix things to the walls without having to fix noggins to where i wanted to fix walls, seats cupboards ect, as i dont know where they are going to go untill i source a donor caravan.
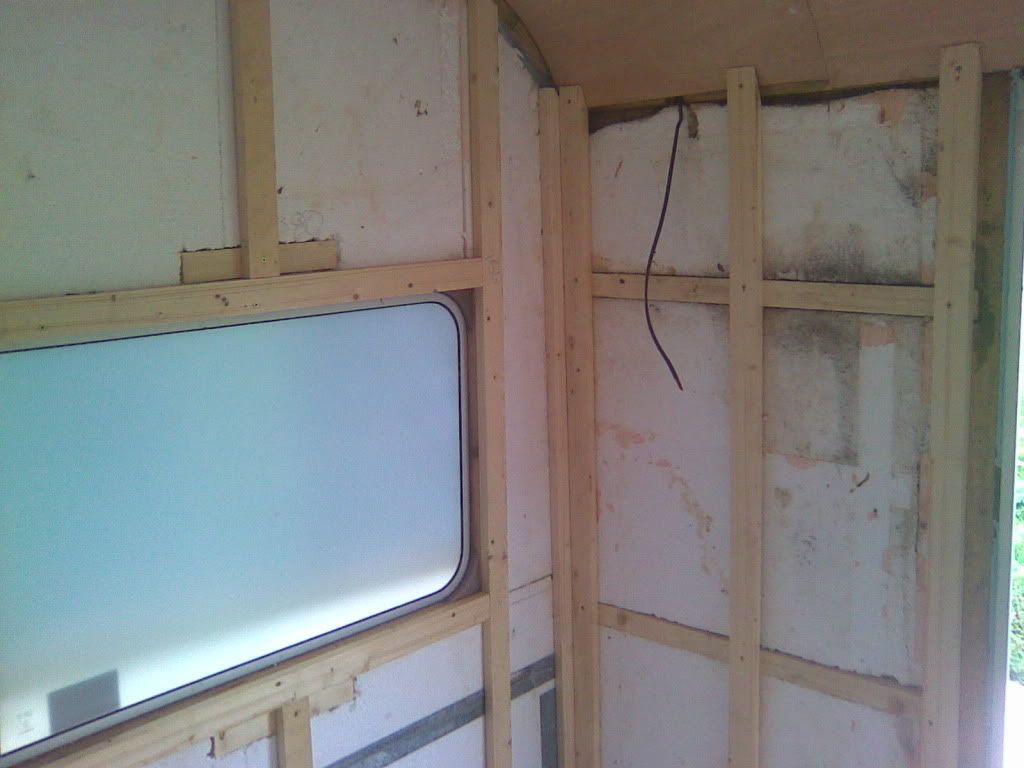
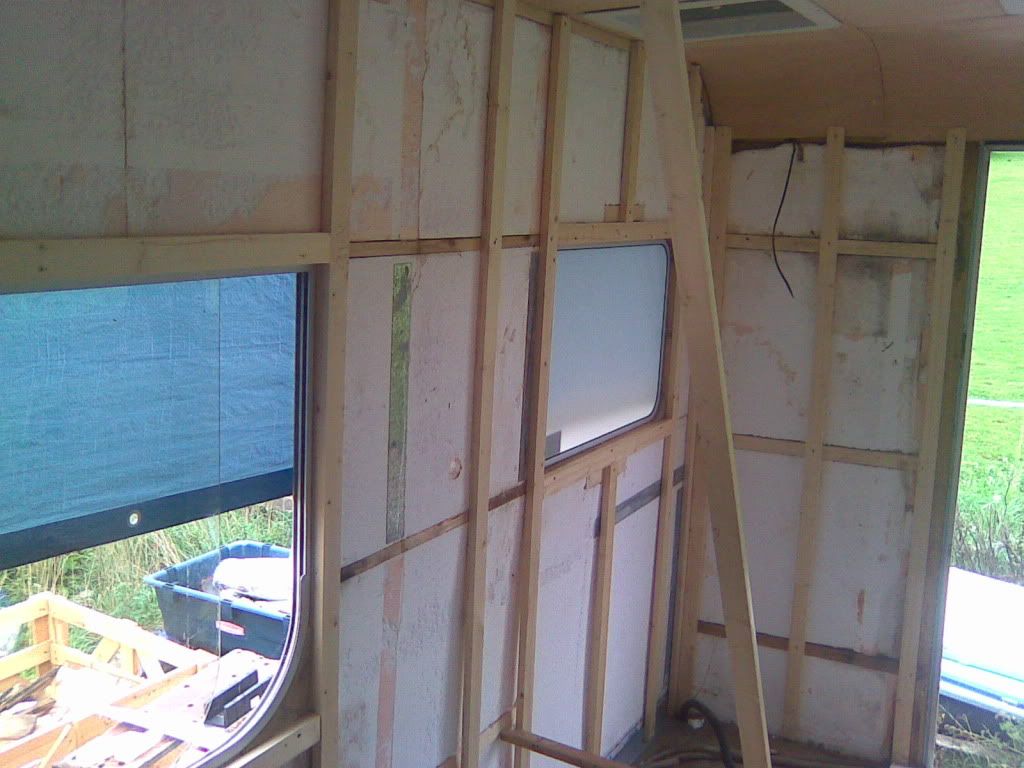
[b]Support noggin to tie the lower half of the wall in
 [/b]
[/b]
The skylight in the luton was the first task as it was leaking badly, usual problem of the mastic tape going hard and allowing water in.
The frame work was rotten so i replaced with slightly wider timber as the skylight was a replacement unit and all the screw were just biting on the fibreglass.
Once that was done i needed to replace the last window frame in the living area
I now tackled the roof lining in the luton, i got some foiled lined insulation from work and stuck it the ceiling with spray glue
After fitting new new support timbers for headlining i could refit the bars and stretch the lining back into shape, stapling as i went. The lining is not in the best condition so i am going to get some fabric and just patch over the bad bits
Where the fibreglass roof met the aluminium roof there was a timber spanning across the whole ceiling that i had to take down as the ends were rotten. I didnt want to replace this, as it was shaped to fit and it had the right profile, so i put it back with plenty of mastic and just repaired the ends.
I did however need to put an extra timber in adjacent to this one to replace the ceiling ply. I had to cut grooves in the wood so it would bend to the shape of the roof. I cut the polysyrene back and used contact adhesive to fix.
Once i done that i fixed some new ply to the ceiling and stretch the rest of the headlining in place.
Now to finish the rest of the ceiling and skylight trim in the toilet area
I could now start to strengthen the walls. I wasnt going to try and stick 3mm ply back to polystyrene or stick loads of noggins in and rely on glue to keep the strength.
So after measuring the width of the van i realised i had plenty of room to batten in front of the poly and fix 6mm ply to that. This would also anable me to be able to fix things to the walls without having to fix noggins to where i wanted to fix walls, seats cupboards ect, as i dont know where they are going to go untill i source a donor caravan.
[b]Support noggin to tie the lower half of the wall in
[/b]-
davev6newman - Transit Devotee
- Posts: 971
- Joined: Thu Mar 09, 2006 7:57 pm
- Location: Luton
Re: My latest project mk2 CI Travelhome LWB
![]() by The Docmeister » Mon Sep 20, 2010 2:41 pm
by The Docmeister » Mon Sep 20, 2010 2:41 pm
This is the most inspiring thread I've read in a long while!
Keep up the good work.
Keep up the good work.
-
The Docmeister - Transit Aficionado
- Posts: 136
- Joined: Tue Jan 16, 2007 2:38 am
- Location: Glasgow
Re: My latest project mk2 CI Travelhome LWB
![]() by davev6newman » Mon Sep 20, 2010 8:44 pm
by davev6newman » Mon Sep 20, 2010 8:44 pm
[b]Ive not had much time this weekend, Sunday looked dry so i thought i would tackle the overcab luton area as it was the only area i had not made watertight.
First hurdle was getting the screws out of the trim, even tho there was no wood behind them they still need to be turned and the screw heads were just rusted up and full of shite.
Now for the lower trim

Once they were off i just needed to prise out some tacks that hold the front panel onto the sides and it lifted away
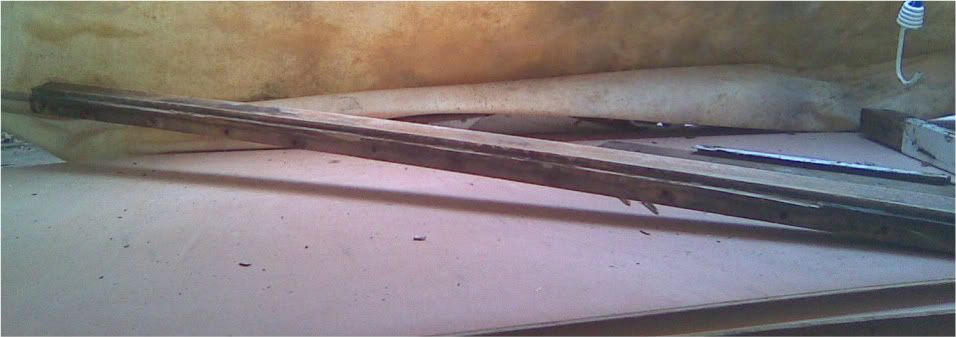
The only bit of timber that wouldnt come away in my hands was this section that spanned across the lower front. It should be 120mm x 25mm!
The cheapest bit of timber i could get to replace it was a bit of economy decking from B&Q, i just drew around the panel and cut with a jigsaw and glued in place.
The actual base of the bunk by now and dropped onto the cab roof but was still attached at the rear edge.
As you can see i had to glue some timber to the side wall (held temp with a couple of screws) and screw timber to the base board on both sides
View of the base board before fresh timber
Once i had the fresh timbers in place i propped up the base board and screwed the lot together with 75mm self drilling screws that would not split the wood.
The front panel needed some timber fixed to the top edge, but the panel was curved. So once again i had to cut grooves into the back of the wood to enable it to curve.
And that is as far as i got before it got dark. Ive had to temp fix panel in place and cover with tarpaulin.[/b]
First hurdle was getting the screws out of the trim, even tho there was no wood behind them they still need to be turned and the screw heads were just rusted up and full of shite.
Now for the lower trim
Once they were off i just needed to prise out some tacks that hold the front panel onto the sides and it lifted away
The only bit of timber that wouldnt come away in my hands was this section that spanned across the lower front. It should be 120mm x 25mm!
The cheapest bit of timber i could get to replace it was a bit of economy decking from B&Q, i just drew around the panel and cut with a jigsaw and glued in place.
The actual base of the bunk by now and dropped onto the cab roof but was still attached at the rear edge.
As you can see i had to glue some timber to the side wall (held temp with a couple of screws) and screw timber to the base board on both sides
View of the base board before fresh timber
Once i had the fresh timbers in place i propped up the base board and screwed the lot together with 75mm self drilling screws that would not split the wood.
The front panel needed some timber fixed to the top edge, but the panel was curved. So once again i had to cut grooves into the back of the wood to enable it to curve.
And that is as far as i got before it got dark. Ive had to temp fix panel in place and cover with tarpaulin.[/b]
-
davev6newman - Transit Devotee
- Posts: 971
- Joined: Thu Mar 09, 2006 7:57 pm
- Location: Luton
Re: My latest project mk2 CI Travelhome LWB
![]() by davev6newman » Thu Sep 23, 2010 9:54 pm
by davev6newman » Thu Sep 23, 2010 9:54 pm
i have just bought the donor caravan, and what a bargain it is, pick it up Saturday
http://cgi.ebay.co.uk/LUNAR-METEORITE-S ... 1c15d31df1
http://cgi.ebay.co.uk/LUNAR-METEORITE-S ... 1c15d31df1
-
davev6newman - Transit Devotee
- Posts: 971
- Joined: Thu Mar 09, 2006 7:57 pm
- Location: Luton
Return to Members Transit's - Progress Reports!
Who is online
Users browsing this forum: No registered users